Bamboo adds exotic beauty to any garden. However, its aggressive growth often turns into a landscaping nightmare. Running bamboo species spread rapidly through underground stems called rhizomes. Consequently, these rhizomes invade lawns, crack patios, and annoy neighbors. You must contain them effectively. A high-density polyethylene (HDPE) root barrier offers the best defense. This guide explains how to install a root barrier system correctly.
Understanding the Enemy: Rhizomes
Before digging, you must understand how bamboo spreads. Running bamboo does not grow like a tree. Instead, it sends out horizontal runners just below the soil surface. These runners, or rhizomes, are incredibly strong. They can pierce through asphalt and poor-quality barriers. Therefore, simple landscape fabric will fail.
You need a heavy-duty physical shield. Experts recommend a barrier thickness of at least 60 mil. Anything thinner risks puncture. Additionally, the material must be smooth. A smooth surface prevents roots from gripping the barrier. If the root cannot grip, it cannot turn downward. Instead, it slides along the surface. Eventually, we want it to turn upward toward the light. Once it surfaces, you can easily prune it.
What We Recommend
When installing a root barrier system, you’ll need a quality barrier material that’s specifically designed to withstand bamboo’s aggressive rhizomes. The 50ft Tree Root barrier is exactly what we reach for—it’s heavy-duty, comes in practical lengths, and makes the installation process straightforward. This is the foundation of any successful bamboo containment system.
Breaking through compacted soil and preparing the installation trench is much easier with the right tool. The Fiskars IsoCore Pickaxe handles tough digging work without wearing out your shoulders, making it ideal for the hard labor involved in root barrier installation.
Securing your barrier material at the top of the trench requires sturdy fasteners and a reliable way to install them. A cordless drill/driver like the PULITUO model makes quick work of anchoring your barrier to landscape edging or caps, saving you time and ensuring a secure installation.
Proper safety gear is non-negotiable when you’re doing digging and installation work. COOLJOB Gardening Gloves protect your hands from sharp barrier edges, soil irritants, and tool blisters while maintaining the dexterity you need for detailed work.
Finally, seal the top edge of your barrier with a quality utility knife for precise cuts and adjustments. The WORKPRO Utility Knife gives you clean, controlled cuts through barrier material and makes it easy to fit your barrier perfectly to your garden’s layout.
Phase 1: Planning and Preparation
Preparation determines your success. First, define the containment area. Mark the perimeter with spray paint or a garden hose. Be realistic about the space bamboo requires. Confining a giant timber bamboo to a tiny box will eventually fail. The pressure becomes too great. Thus, allow ample room for the plant to thrive.
Call Before You Dig
Safety comes first. You must call your local utility marking service (often 811 in the US) before excavation. Striking a gas line or electric cable causes severe danger. Wait for them to mark the lines. Only then should you break ground.
Gather the Right Tools
This project requires significant physical labor. Therefore, proper tools make a huge difference. You will need:
- Trenching shovel: A narrow blade helps dig deep, clean trenches.
- Mattock or Pickaxe: Essential for breaking hard soil and cutting tree roots.
- Root Barrier Material: HDPE plastic, usually 30 inches wide.
- Stainless Steel Clamps: To seal the barrier ends.
- Drill: For securing the clamps.
- Utility Knife: To cut the plastic.
Phase 2: Excavation Strategies
Digging the trench is the hardest part. Source You need a continuous trench around the bamboo. Alternatively, you can dig a three-sided trench if a concrete foundation blocks the fourth side. However, ensure the foundation is deep. Bamboo can dive under shallow footings. .
Aim for a depth of roughly 28 inches. Most rhizomes travel in the top 12 inches of soil. Nevertheless, a deeper trench provides a safety margin. Keep the trench width manageable. You only need enough space to slide the barrier in and work comfortably. Usually, four to six inches wide works well.
Sloping the Trench Walls
Here is a critical detail many people miss. Do not dig vertical walls. Instead, slope the outer wall of the trench outward. You want the trench to be wider at the top than at the bottom. This angle is vital for the next step. If the wall is vertical, roots might hit it and go straight down. Conversely, an angled wall guides them up.
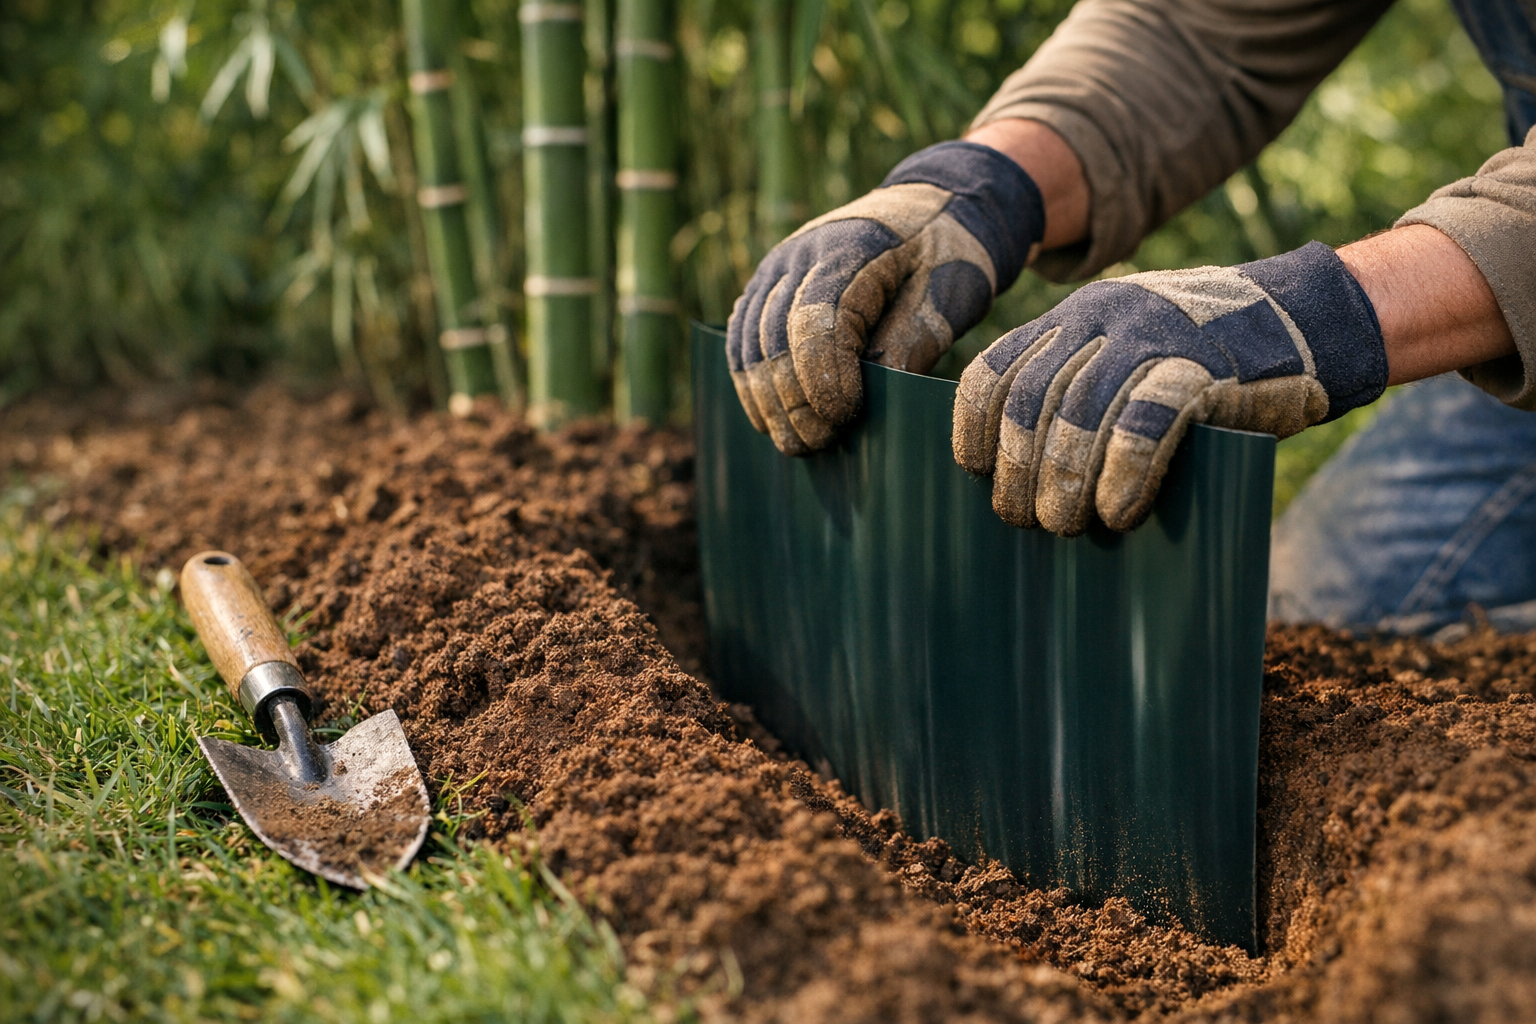
Phase 3: Installing the Barrier
Now, place the HDPE plastic into the trench. This step requires precision. Slide the material into the hole. Push it tight against the outer wall of the trench. Remember the slope we created? The barrier should lean back away from the bamboo. Ideally, aim for a 15-degree angle.
When a rhizome hits this angled plastic, it follows the path of least resistance. The angle directs the growth upward. Consequently, the rhizome pops out of the ground. Once visible, you can clip it. If you install the barrier vertically, the rhizome might turn downward. If it goes deep enough, it will eventually tunnel under your barrier.
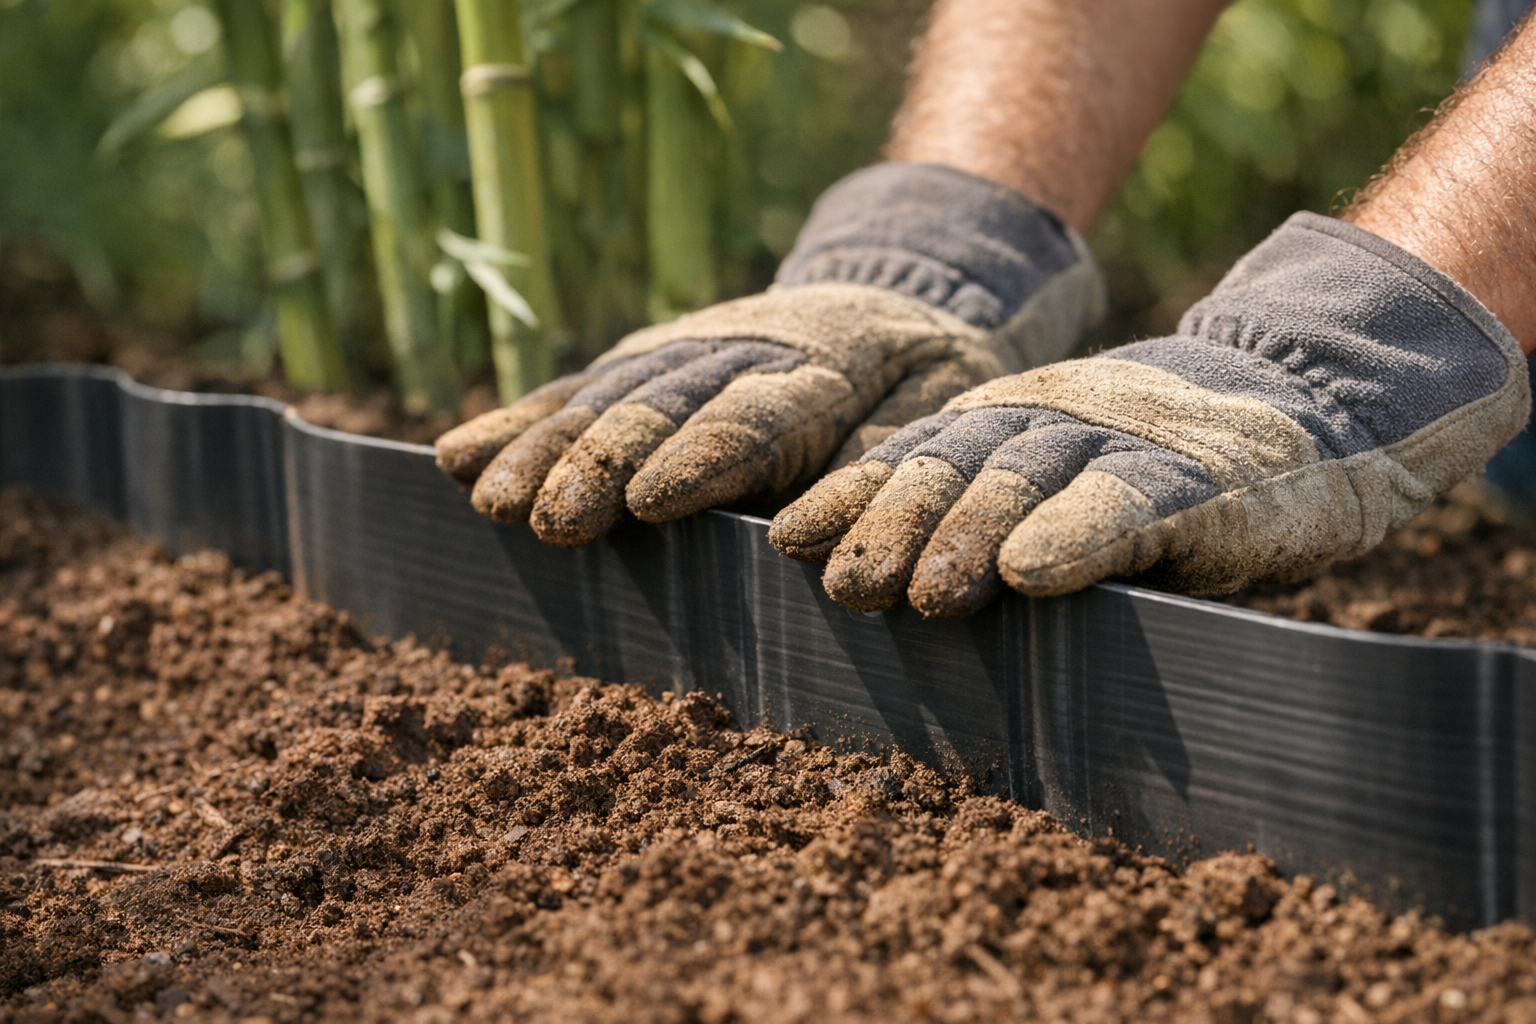
Leaving a Lip Above Ground
Never bury the barrier completely. You must leave at least two inches of plastic visible above the soil line. This creates a “lip.” Without this lip, rhizomes will simply crawl over the top of the buried plastic. They move through the mulch and escape. Therefore, keep the top edge visible and clear of debris. This visible edge acts as your final line of defense.
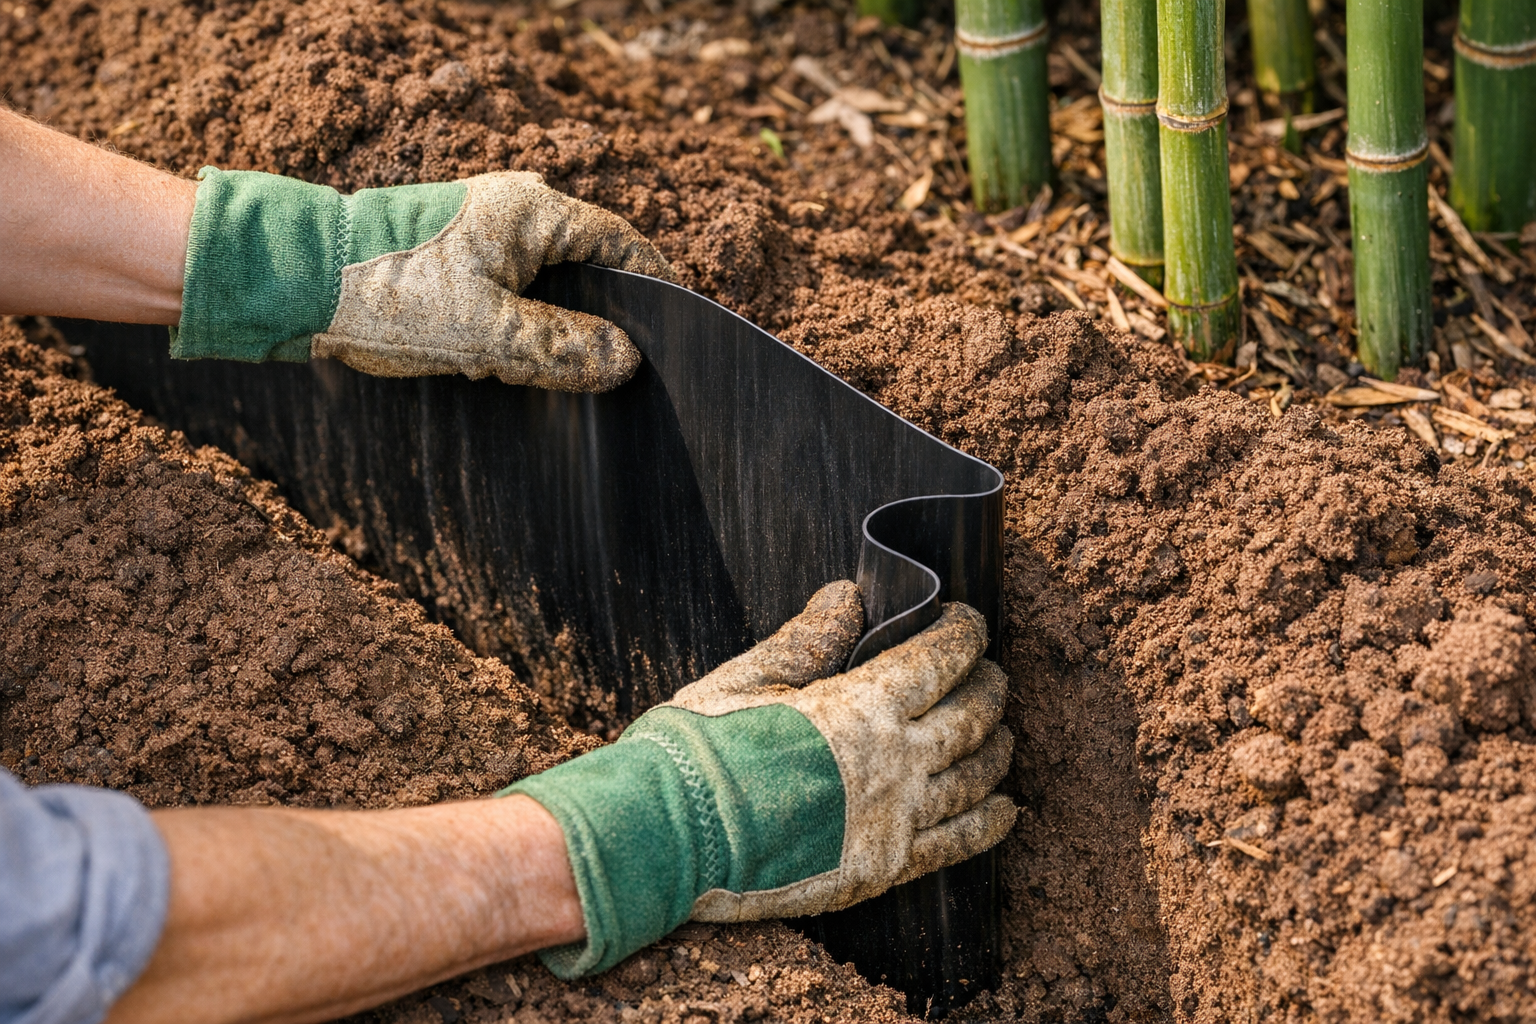
Phase 4: Sealing the Ends
Most installations require connecting two ends of the plastic to form a circle. This connection point is a weak spot. Bamboo roots are opportunistic. They will find any gap, no matter how small. Therefore, you cannot simply overlap the plastic and hope for the best. You must create a seal.
Overlap the material by at least two feet. Then, apply heavy-duty double-sided tape between the layers. However, tape alone is insufficient. You should also use a closure strip or stainless steel clamps. Bolt the layers together tightly. This mechanical bond prevents the roots from prying the layers apart. A secure seal ensures the containment system remains integral.
Phase 5: Backfilling and Compacting
Once the barrier sits correctly, begin backfilling. Fill the trench with the excavated soil. Do not throw rocks or sharp debris against the plastic. Sharp objects could puncture the barrier as the ground settles.
Compact the soil firmly as you go. Loose soil settles over time, which might expose too much barrier or destabilize the angle. Use a tamper or the handle of your shovel. Pack the dirt tight against the barrier. This support helps the plastic maintain its shape against the pressure of the growing roots.
Finally, check your height again. Ensure the two-inch lip remains visible above the final grade. Adjust the soil level if necessary.
Long-Term Maintenance
Installing the barrier does not mean you can forget about it. Bamboo requires vigilance. A root barrier acts as a tool, not a magic spell. You must inspect the perimeter annually.
The Annual Inspection
Regular Barrier Lip Inspection
Inspect the exposed barrier edge at least twice per year. Focus on the top 2-3 inches that sit above ground level. This visible lip serves as your first line of defense. Additionally, schedule inspections during spring and fall when bamboo growth is most active. Mark these dates on your calendar to ensure consistency.
The barrier’s upper edge collects organic matter surprisingly quickly. Fallen leaves pile up within days during autumn. Furthermore, lawn maintenance activities deposit grass clippings along the barrier line. Wind-blown mulch gradually accumulates against the plastic or metal surface. Even small amounts of soil can wash against the lip during heavy rainfall.
Understanding the Debris Bridge Problem
Organic debris creates an unintended pathway for aggressive rhizomes. These underground stems actively seek new territory to colonize. However, they cannot naturally climb over a properly installed barrier. Therefore, accumulated material becomes their escape route.
Think of debris as a ramp or ladder. A three-inch layer of decomposing leaves provides sufficient depth for rhizomes to travel across. Moreover, compacted grass clippings form a dense mat that rhizomes exploit readily. The rhizome simply grows through this organic bridge and continues spreading beyond your barrier.
Effective Debris Removal Techniques
Clear the barrier perimeter using a stiff-bristled brush or hand rake. Work gently to avoid damaging the barrier material itself. Additionally, pull away any mulch within six inches of the barrier edge. Create a clean zone that extends around the entire perimeter.
For example, establish a maintenance schedule every six weeks during growing season. Use a garden hose to wash away stubborn debris. Consequently, you’ll maintain a clear visual inspection path. This practice takes only 15-20 minutes for most residential installations.
Identifying Escaping Rhizomes
Watch for pale, pointed shoots attempting to crest the barrier. These rhizomes appear cream-colored or light tan when freshly exposed. Furthermore, they feel firm and segmented when touched. Young rhizomes are typically pencil-thick to finger-thick in diameter.
Check both sides of the barrier during each inspection. Look for any root material touching the top edge. Meanwhile, examine the ground immediately outside the barrier for new bamboo shoots. These indicate a rhizome has successfully escaped.
Immediate Rhizome Removal Protocol
Cut discovered rhizomes immediately using sharp pruning shears or loppers. Make the cut at least two inches below the barrier’s top edge. Additionally, trace the rhizome back toward the main bamboo grove. Remove any portion that has grown over or around the barrier.
Dispose of cut rhizomes in yard waste bags, not compost piles. These segments can regenerate if conditions allow. Therefore, proper disposal prevents accidental spreading. As a result, your containment system remains effective and your bamboo stays controlled.
Also, watch for rhizomes diving deep. While the barrier stops most, nature is persistent. However, with the barrier angled correctly, deep escapes are rare. Regular checks ensure your bamboo stays a beautiful feature rather than becoming a burden. By following these steps, you enjoy the zen of bamboo without the stress of invasion.
*As an Amazon Associate, I earn from qualifying purchases.