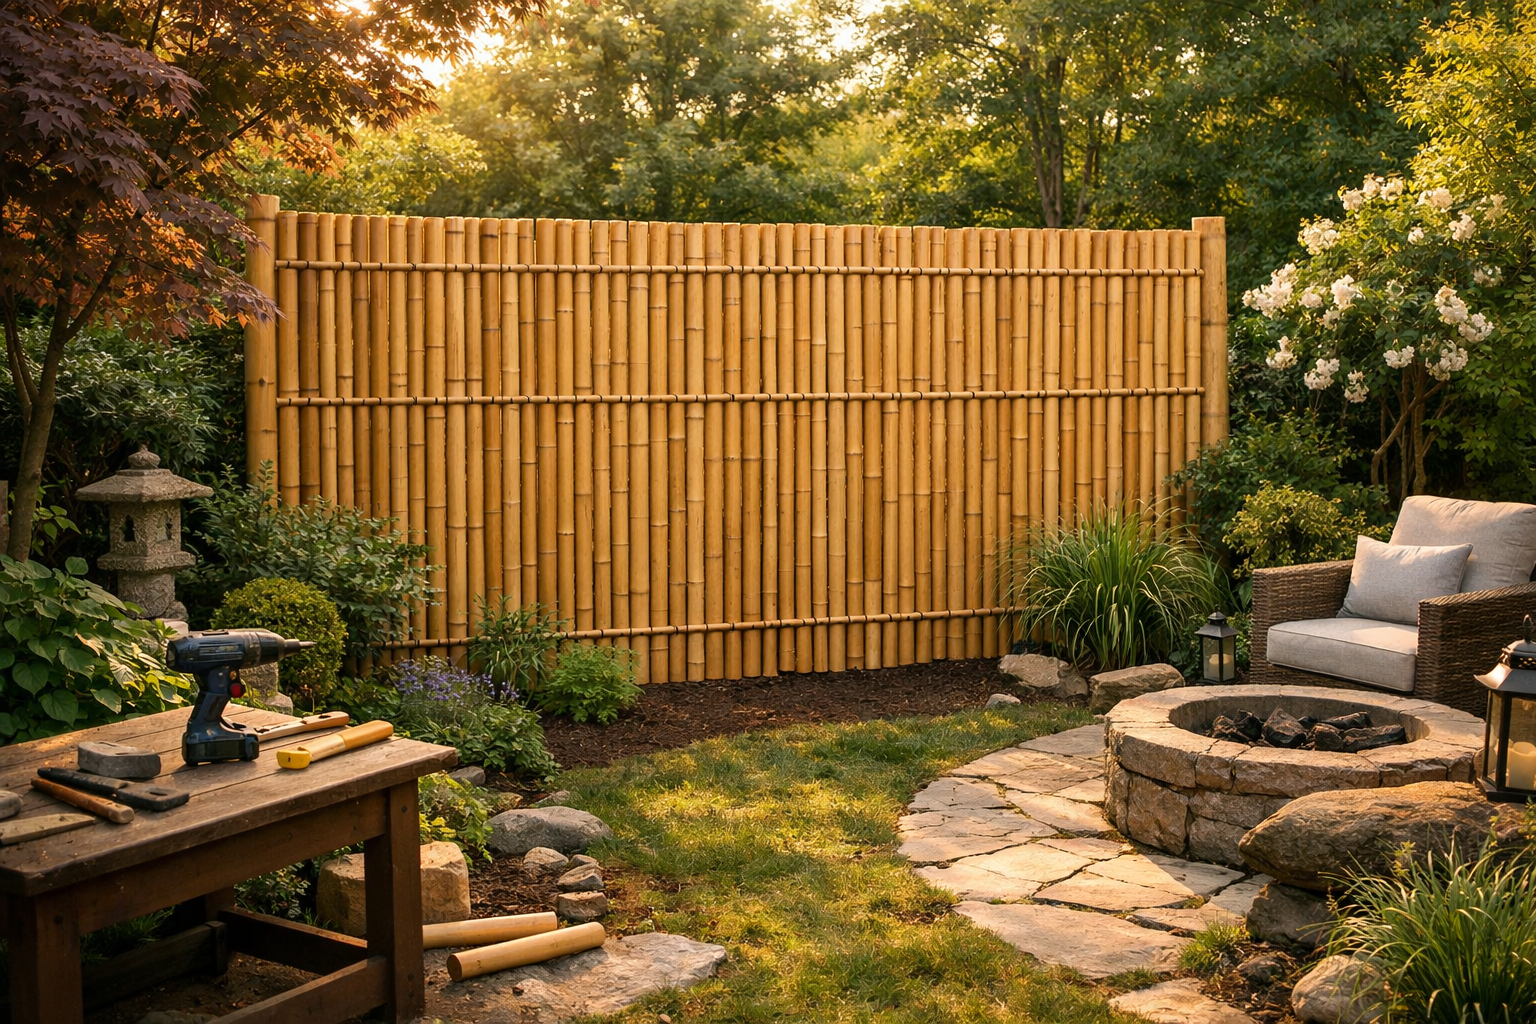
It was a Saturday morning, coffee in hand, staring at my neighbor’s bathroom window that looked directly into my patio. I’d been tolerating it for two years. That day, I finally decided to do something about it. By 2 p.m., I had a bamboo privacy screen installed, a few sore knuckles, and an enormous sense of satisfaction. If you’re searching for how to install bamboo privacy screen panels at home, I want you to know: you absolutely can do this yourself, even if you’ve never done a home improvement project in your life.
This post contains affiliate links. As an Amazon Associate I earn from qualifying purchases at no extra cost to you.
What You’ll Need Before You Start
Before I walked outside that Saturday, I spent about 20 minutes gathering supplies. This is the step I’d tell my past self to take more seriously. I made three trips back into the house for things I forgot. Learn from my chaos.
The Bamboo Screening Panel
This is obviously the star of the show. I used a 6.5ft x 13ft Bamboo Slat Screening Roll for my patio fence, and it covered the full length I needed with a bit left over to trim. The slats are tightly woven, the color is a warm natural tan, and the whole roll is surprisingly lightweight for how sturdy it feels once it’s up.
If you have a shorter fence or a balcony railing situation, the Sprigra Bamboo Slat Fence 4ft x 13ft is a great option. It’s designed specifically for balconies and poolside areas, and the size makes it easier to handle if you’re working alone in a smaller space. That would have been my pick if I were wrapping a railing rather than a full fence panel.
For thicker, more traditional-looking bamboo poles rather than flat slats, the Forever Bamboo Natural Bamboo Fencing Roll (6ft H x 8ft L) is beautiful. The poles are 0.75 inches in diameter, and this one gives a more tropical, lush aesthetic. I almost chose it, and I still might use it on a second section of my yard.
Posts, Stakes, and Fasteners
You’ll need something to attach your bamboo screen to. If you’re working with an existing fence, you may just need zip ties or garden wire. If you’re creating a freestanding screen, you’ll need posts. I used the YIDIE Garden Stakes Sturdy Metal Fence Posts (5ft), which are plastic-coated steel and incredibly easy to drive into the ground. They’re sold in a pack of 50, which sounds like a lot, but I used eight of them and I’ll use the rest for tomatoes this summer.
I also kept a handful of BOVITRO 4ft Natural Bamboo Stakes on hand for any extra horizontal support I needed. They blended in perfectly with the bamboo screen and cost almost nothing.
Here’s your full materials checklist:
- Bamboo privacy screen roll (sized for your space)
- Metal or wooden fence posts
- Zip ties or galvanized garden wire
- Mallet or post driver
- Measuring tape
- Wire cutters or scissors
- Work gloves (trust me on this one)
- A helper, or at least a bungee cord to hold one end temporarily
Step-by-Step: How to Install a Bamboo Privacy Screen
Okay, here’s where we get into the actual process. I’m going to walk you through exactly what I did, including the mistakes I made so you don’t repeat them.
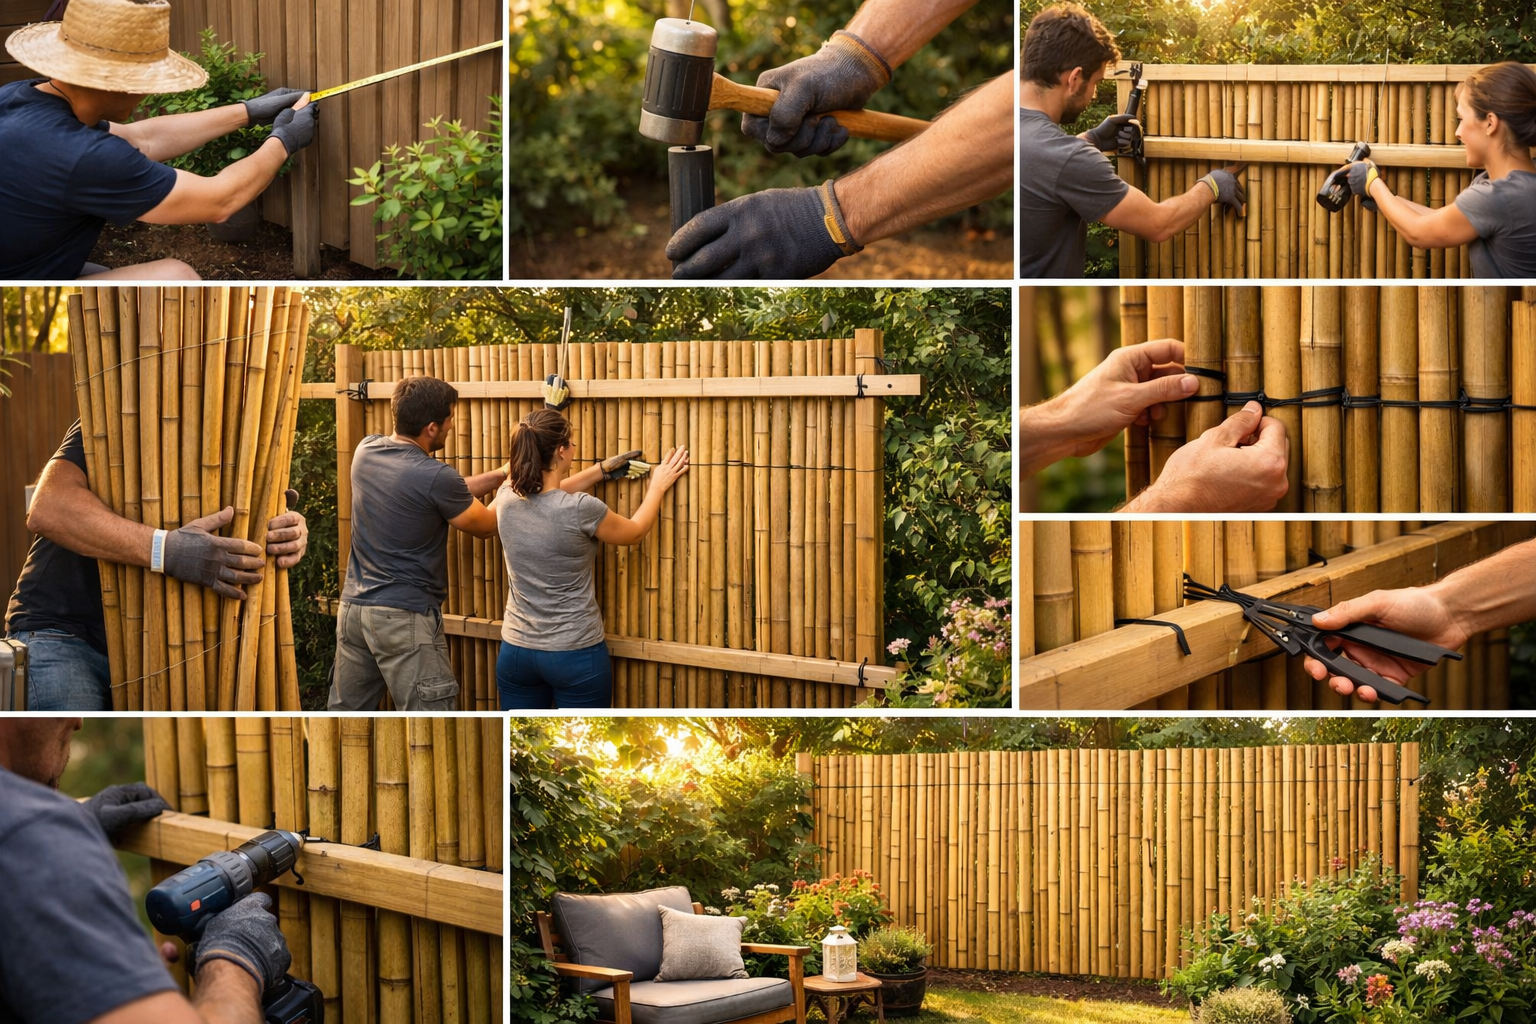
Step 1: Measure Your Space
Before you unroll anything, measure the area you want to cover. Height and length. Write it down. I thought I had it memorized and I did not. I ordered exactly the right length and nearly cut too much off because I was guessing. Measure twice, cut once — the oldest advice in the world, and I almost ignored it.
Step 2: Set Your Posts or Identify Your Attachment Points
If you’re attaching to an existing fence or wall, look for the structural points — fence rails, posts, or brackets — where you’ll tie your bamboo screen. Mark them with a piece of tape or chalk.
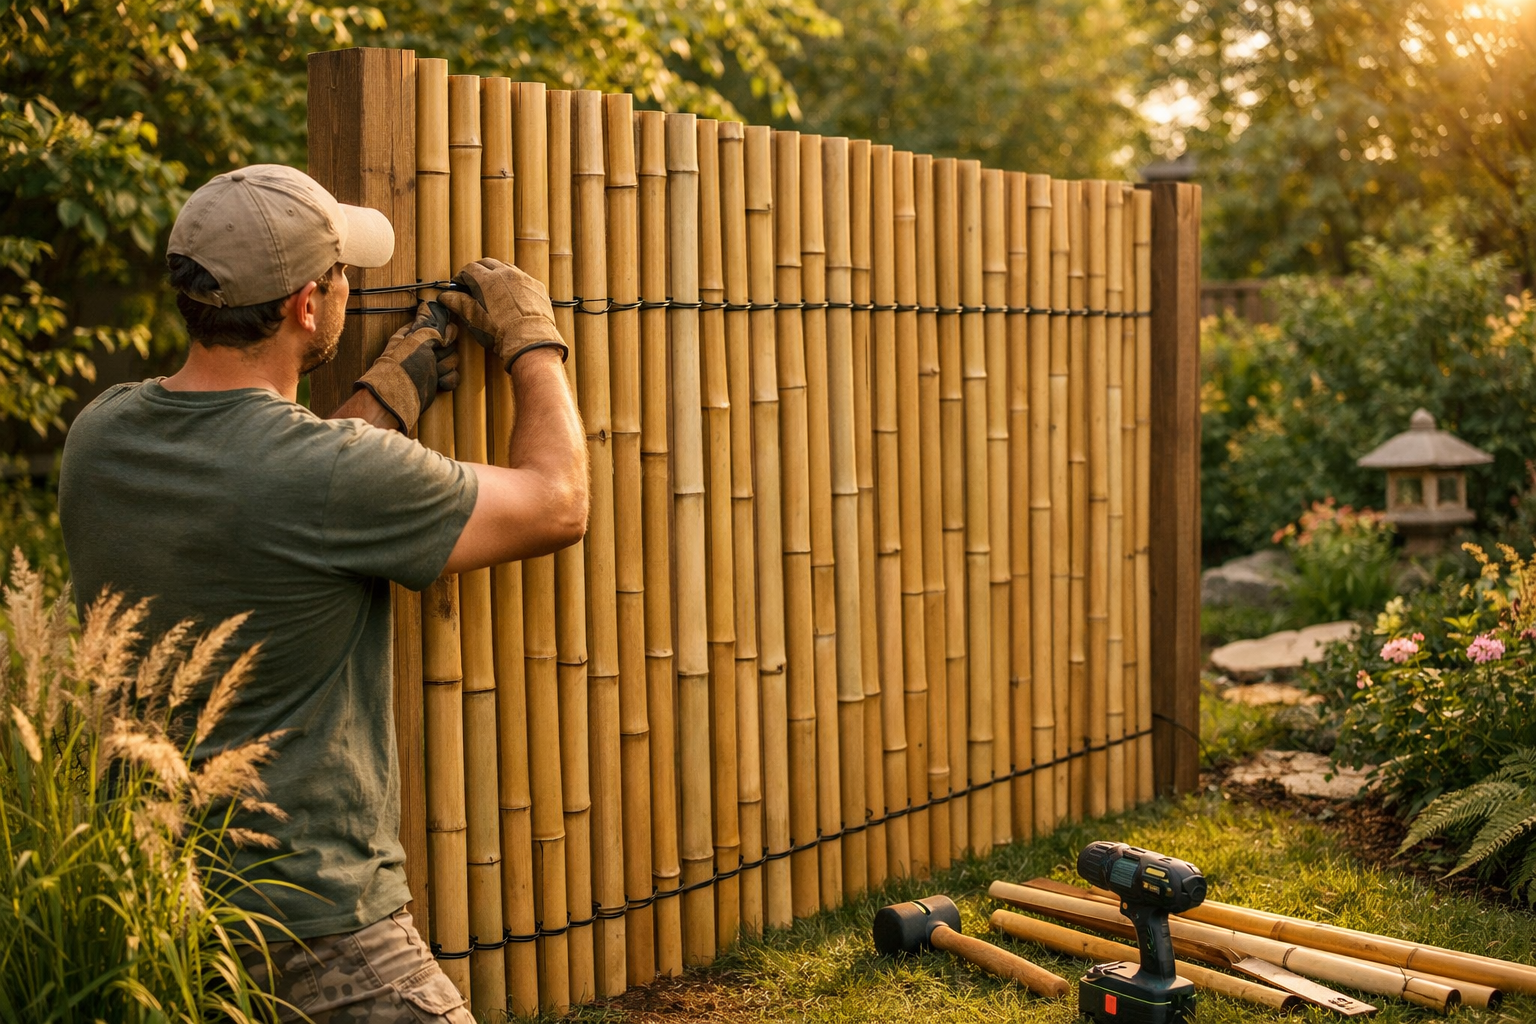
If you’re going freestanding, drive your metal posts into the ground every four to six feet along your planned screen line. I used a rubber mallet and it went faster than I expected. Get them at least 12 inches deep for stability, deeper if your soil is soft or if you live somewhere with wind.
Step 3: Unroll and Position the Screen
This is the step where a helper really earns their keep. Unroll the bamboo screen along the fence or post line. Hold it at the desired height — mine needed to clear the top of the existing fence rail by about six inches for full privacy coverage. If you’re working solo, bungee one end temporarily to a post while you position the other end. I learned this trick after about 15 minutes of the screen flopping back on me.
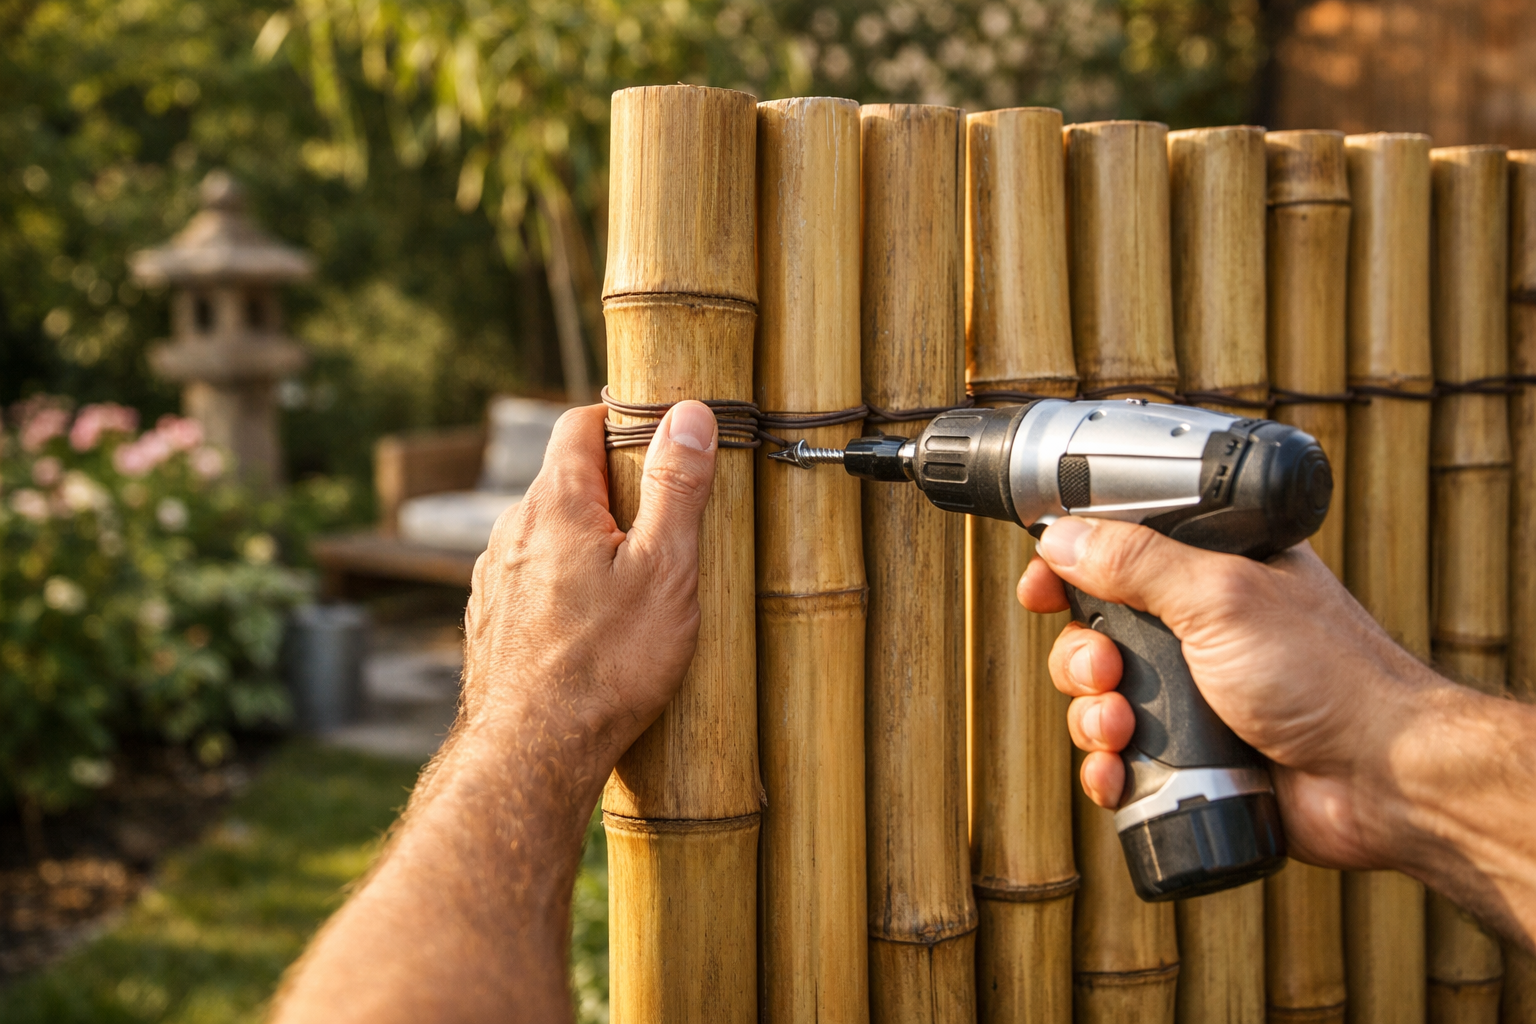
Step 4: Attach the Screen
Start at one end and work your way across. Use zip ties or galvanized wire to secure the screen to each post or fence rail. I did the top edge first along the whole length, then went back and did the bottom, then added a middle row. This three-row attachment approach keeps everything taut and prevents sagging over time.
Attach a tie every 12 to 18 inches along each rail. It sounds like a lot, but this is what keeps your screen looking neat and professional rather than droopy and sad. I made the mistake of spacing mine too far apart on the first section and had to go back and add more. Take your time here.
Step 5: Trim Any Excess
If your screen is longer than your fence run, use wire cutters to snip the connecting wire between slats and trim to length. The slat rolls cut cleanly once you’ve identified where the wire runs. Take your time here — a crooked cut shows.
Tips I Wish Someone Had Told Me
Four hours of trial and error generated a few lessons. Here are the ones that would have saved me the most time and frustration.
Don’t Skip the Gloves
Bamboo edges and the wire holding slats together are both surprisingly sharp. I have a small collection of nicks on my palms from not wearing gloves for the first 30 minutes. Wear the gloves.
Let It Breathe Before Final Attachment
Unroll your bamboo screen and let it sit in the sun for an hour before you attach it. This lets it relax and flatten out, which makes for a tidier final result. I skipped this and dealt with some slight waviness for the first week until it settled on its own.
Consider Reed Panels for Windy Areas
If your space gets significant wind, a reed-style panel can actually be a better choice than thick bamboo slats because the reeds flex rather than catch wind like a sail. The VEVOR Reed Fencing Roll (5.5 x 16.4 ft) is excellent for this. It provides great privacy while being more wind-tolerant than the heavier slat panels. For a budget-friendly version, this Natural Reed Fencing Roll with Cable Zip Ties included is a clever buy — the zip ties are already in the package, which is one less thing to forget at the hardware store.
Seal It If You Want It to Last
Bamboo is naturally durable, but a coat of clear outdoor sealant extends its life significantly, especially in rainy climates. I applied sealant to mine in the fall after installation and it’s held up beautifully through a full winter. This is optional but genuinely worth doing.
Bigger Rolls Save Time on Long Fence Runs
If you’re covering more than 10 feet, get a larger roll rather than seaming multiple smaller ones. Seams are noticeable and add extra work. The Natural Reed Fencing Roll at 6ft x 16.4ft is a great pick for longer runs. It comes in brown, it’s generously sized, and one roll handled my entire fence line without any seaming needed.
My Final Recommendation and Where to Start
If I were starting over today with what I know now, here’s exactly what I’d tell a first-timer: the how to install bamboo privacy screen process is genuinely straightforward, and you don’t need to overthink it. Pick your panel based on your space — slat rolls for structured, modern fences, reed panels for wind-exposed or balcony situations — set your posts properly, attach in three rows, and give yourself a full morning rather than rushing through it.