Category: Uses & Crafts

  • Bamboo Raised Garden Beds: How a Failed Vegetable Garden Finally Found Its Happy Ending

    Bamboo Raised Garden Beds: How a Failed Vegetable Garden Finally Found Its Happy Ending

    I still remember standing in my backyard on a humid July afternoon, staring at a patch of sad, yellowing tomato plants and fighting back actual tears. I had spent nearly $300 that spring — on seeds, soil amendments, a fancy drip irrigation kit — and every single thing I planted looked like it wanted to die. The ground was clay-heavy, poorly draining, and apparently hostile to anything I wanted to grow. My husband gave me that look — the one that said “maybe gardening just isn’t your thing” — and I have never wanted to prove someone wrong more in my life. That’s when I started researching bamboo raised garden beds DIY projects, and honestly? It changed everything.

    This post contains affiliate links. As an Amazon Associate, I earn from qualifying purchases. This means I may earn a small commission if you click through and make a purchase, at no extra cost to you. I only recommend products I genuinely believe in.

    Why My In-Ground Garden Was Doomed From the Start

    Here’s the thing nobody tells you when you move into a house with a big backyard: square footage does not equal good growing conditions. Our soil had been compacted for years under a lawn that had seen better decades. Drainage was terrible. I’d dump a watering can on the surface and watch it pool and sit there like a tiny, mocking pond. Roots couldn’t penetrate. Nutrients leached out. And because everything was at ground level, I was constantly battling slugs, fungal issues from poor airflow, and a bad back from crouching down to tend to plants that were basically already giving up.

    After my third failed attempt in as many seasons, I was ready to pave the whole thing over and call it a patio. But before I did, I fell down a very wonderful internet rabbit hole about raised bed gardening — and specifically, about using bamboo as a building and support material. It was like a lightbulb moment. Raised beds would let me completely sidestep the terrible native soil. Bamboo would give me sustainable, flexible, beautiful structure. I was back in business.

    Bamboo Raised Garden Beds DIY: What Makes Bamboo Such a Smart Choice

    If you’ve spent any time on this site, you already know bamboo is remarkable stuff. But let me give you the gardening-specific highlights, because they’re genuinely impressive.

    First, bamboo is naturally rot-resistant. Mature, properly cured bamboo contains silica and tannins that help it resist moisture damage far better than untreated softwoods. For raised beds — where the material is constantly adjacent to damp soil and watered regularly — that durability matters enormously. Second, bamboo is incredibly strong for its weight. A bamboo cane the diameter of your thumb can support serious structural loads. Third, and maybe most importantly for my purposes, bamboo is sustainable. It’s a grass, not a tree, and it can be harvested without killing the plant. That felt right for a garden built around growing living things.

    For DIY raised bed projects, here are a few practical bamboo tips I picked up along the way:

    • Use mature culms. Bamboo harvested at 3–5 years of age has the best strength and rot resistance. Younger canes are still green and more prone to splitting and decay.
    • Seal cut ends. The hollow interior of bamboo can trap moisture and accelerate decay. Sealing cut ends with beeswax, linseed oil, or even exterior wood glue extends the life of your canes significantly.
    • Elevate contact points. Where bamboo meets soil directly, it will degrade faster. Use galvanized hardware or concrete footings to keep structural joints above the soil line when possible.
    • Choose the right species. Moso bamboo is a popular choice for structural projects due to its large diameter and density. For smaller support stakes and trellises within your raised beds, thinner-walled species work beautifully.
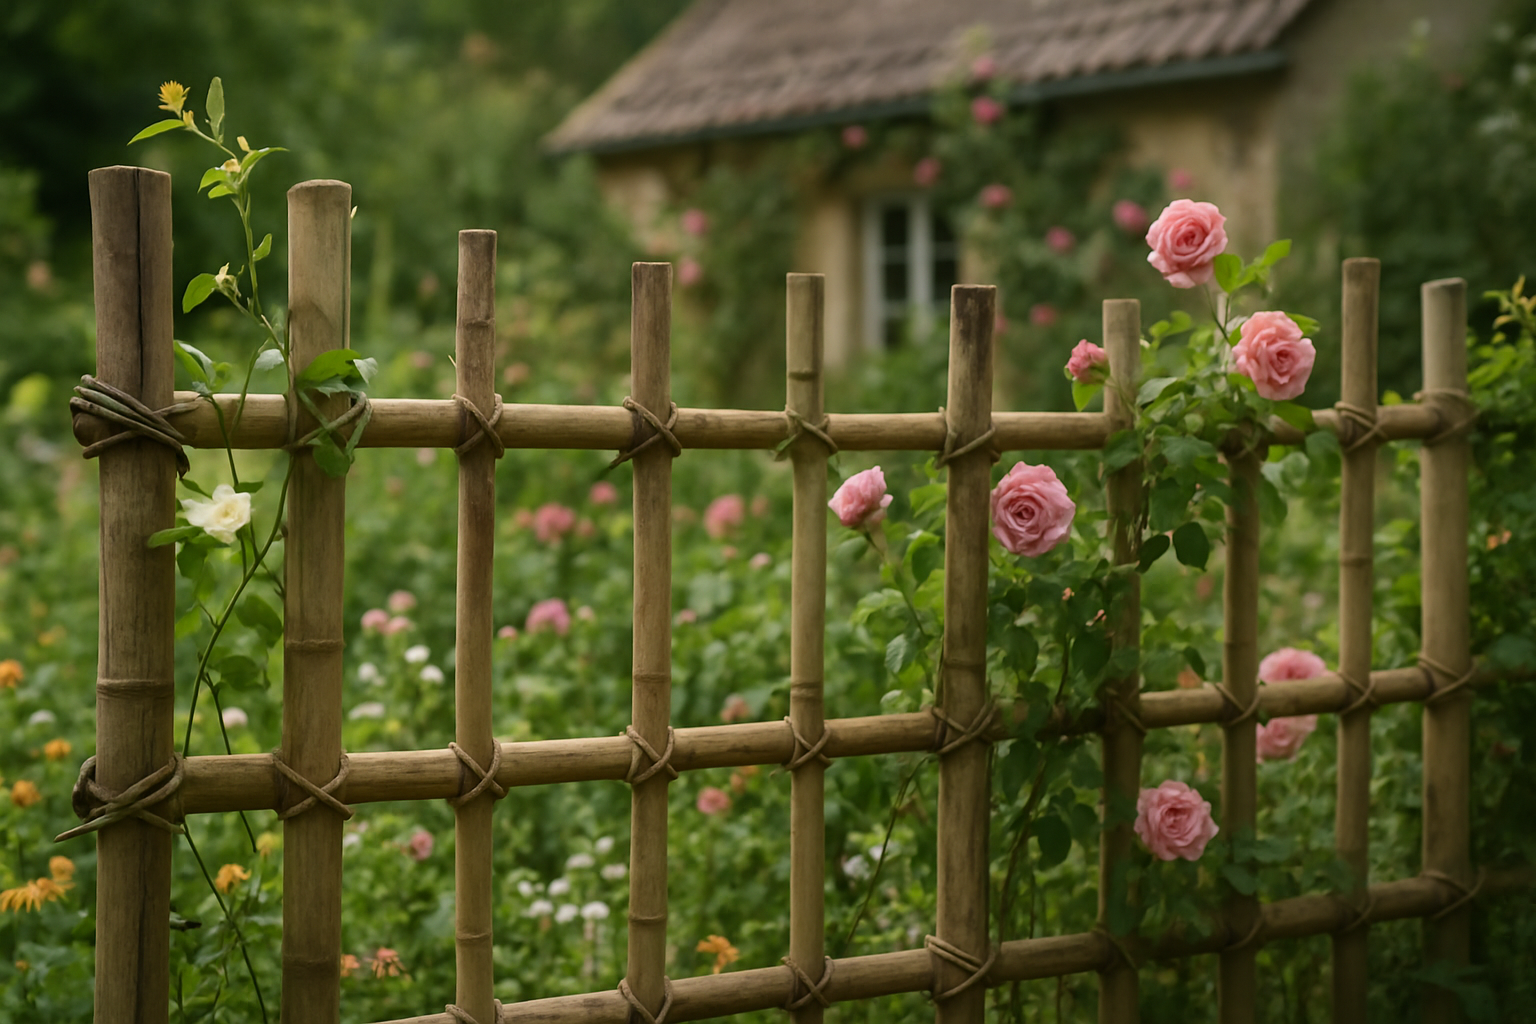
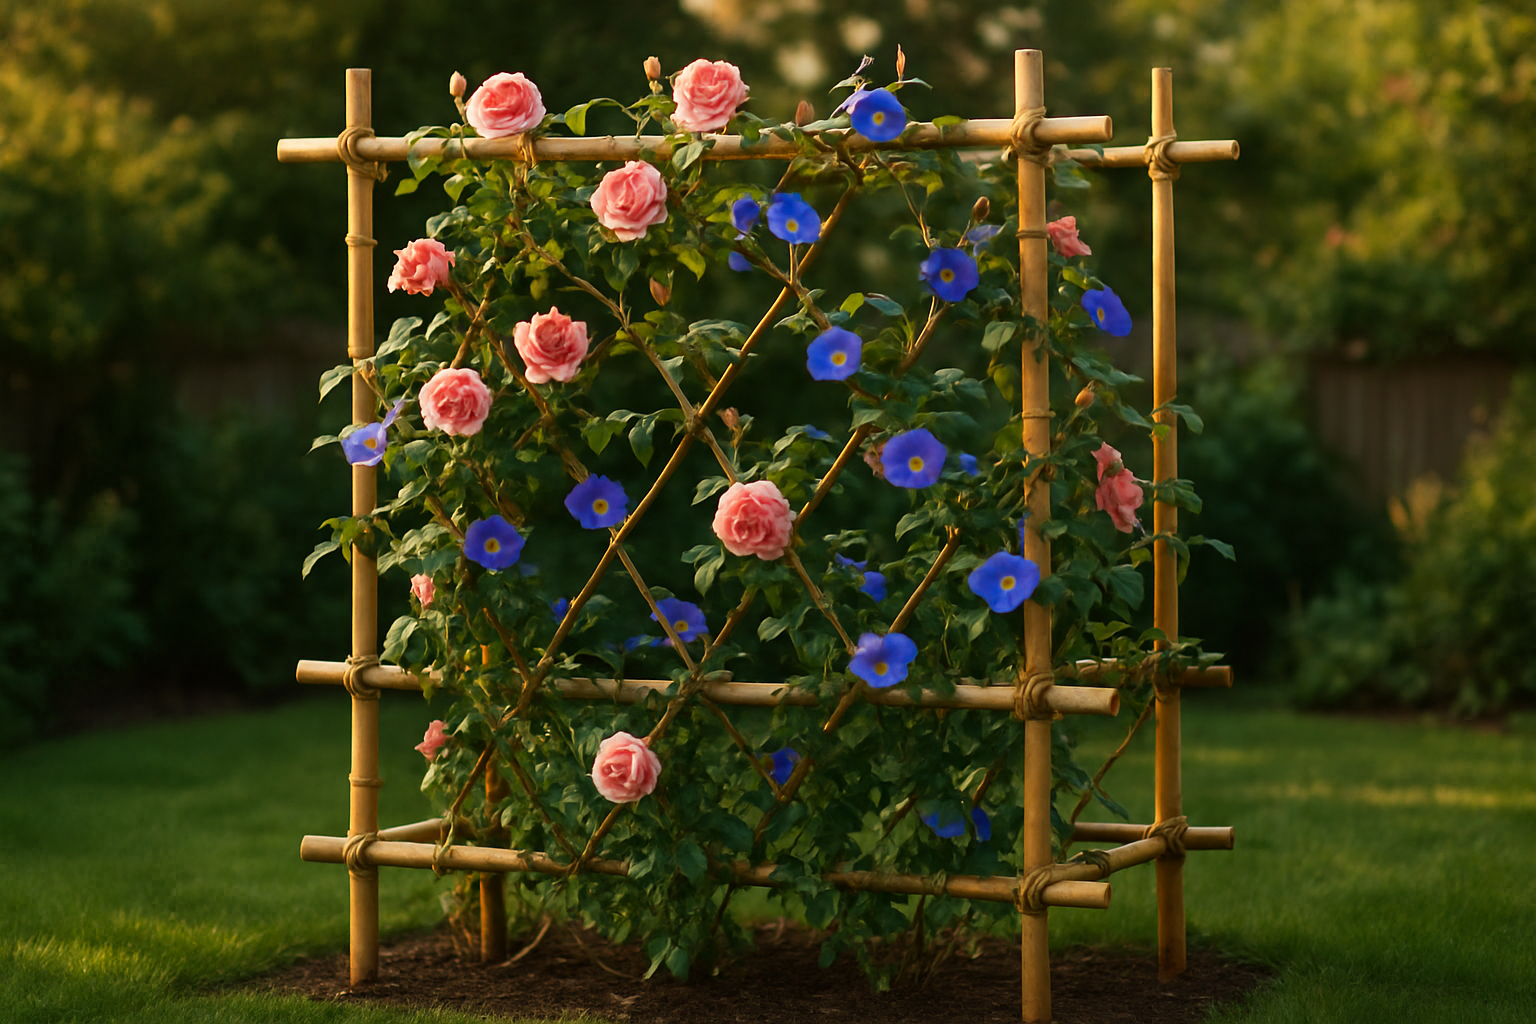
    • Lash, don’t just nail. Traditional bamboo joinery using twine, zip ties, or wire is often stronger than nails or screws, which can split canes. Jute twine is my personal favorite — it looks gorgeous and biodegrades naturally.

    You can use bamboo to build full raised bed frames, internal trellis systems for climbing vegetables, shade structures, or decorative edging. The creative options really are endless once you start thinking in bamboo.

    Tools and Products That Made My Setup So Much Easier

    Now, I want to be honest with you: I’m a DIYer, but I’m not a carpenter. Some parts of my raised bed setup I built with bamboo and elbow grease. Other parts, I leaned on some really well-designed pre-made beds that made the whole project manageable without requiring a workshop full of power tools. Here’s what I actually used and recommend:

    Raised Bed Structures

    For my main growing area, I started with the VINGLI Heavy Duty Raised Garden Bed with Bed Liner. The elevated legs were a game-changer for my back — no more crouching — and the included liner protects the wood while keeping moisture consistent. It’s solid, sturdy, and went together without any drama.

    I also added the S AFSTAR 3-Tier Raised Garden Bed for my herbs. The stackable, dividable design is perfect for organizing different varieties, and the 3-tier height lets me grow things with different light needs in a surprisingly compact footprint. Absolutely love this one for a dedicated herb corner.

    And when I wanted something more durable for a partially shaded, higher-moisture corner of the yard, I went with the Winpull Galvanized Raised Garden Bed. Metal beds in wetter spots just last longer, and the safety edging means I’m not nicking my hands every time I reach in to harvest something.

    Soil and Amendments

    This is where I would have saved myself years of heartbreak if I’d known sooner: the soil in your raised bed is everything. I use Espoma Organic Raised Bed Mix as my base. It’s light, well-draining, and designed specifically for the contained environment of a raised bed — not too dense, not too airy. Plants that struggled for years in my native clay absolutely exploded with growth once I gave them this to work with.

    Then at the start of each season, I top-dress with Charlie’s Compost Organic Fertilizer. It’s odor-free (important when your beds are near a seating area), and the biochar component really does seem to improve moisture retention. My tomatoes this year were obscenely productive. I’m not exaggerating when I say

  • Building a Bamboo Privacy Screen for My Hot Tub: Full DIY Guide and Real Cost

    Building a Bamboo Privacy Screen for My Hot Tub: Full DIY Guide and Real Cost

    • Reed fencing panels (2 rolls): approximately $85
    • Large structural bamboo poles (6): approximately $120
    • Heavy-duty bamboo stakes for framing: approximately $28
    • Outsunny freestanding privacy screen: approximately $140
    • Last summer, I nearly lost my marriage over a hot tub. Not because of anything scandalous — but because I spent $4,200 on a spa installation without telling my husband, and then discovered our backyard had zero privacy. Our neighbors could see everything from their deck. We used the tub exactly once before the awkward wave-and-nod from next door convinced us to cover it with a tarp and pretend it didn’t exist. For three months, that $4,200 investment sat underneath a blue plastic sheet while tension quietly built in our house. What saved us — and honestly, what saved our sanity — was stumbling onto the idea of a bamboo privacy screen hot tub DIY project that I could actually pull off myself on a tight budget.

      This post contains affiliate links. As an Amazon Associate, I earn from qualifying purchases. This means I may earn a small commission if you buy through my links, at no extra cost to you. I only recommend products I’ve personally used or thoroughly researched.

      Why I Chose Bamboo (And Why You Probably Should Too)

      When I started pricing out privacy solutions, I nearly had a second financial heart attack. Wooden privacy fences quoted at $800 to $1,500 for the section I needed. Vinyl panels weren’t much better. And landscaping with fast-growing shrubs meant waiting two or three years before we’d actually have any privacy.

      Bamboo kept coming up as an alternative, and the more I researched it, the more it made sense. Bamboo is naturally weather-resistant, especially when treated or sealed. It handles humidity beautifully — which matters a lot when you’re installing something right next to a hot tub that’s constantly producing steam. It’s also genuinely beautiful in a way that feels organic and intentional, not like you slapped up a cheap screen to hide something.

      The other thing I loved? Bamboo works in layers. You can combine roll fencing, structural poles, and potted bamboo accents to build something that looks designed, even if you’re a total DIY beginner. Which I absolutely was.

      Planning Your Bamboo Privacy Screen Hot Tub DIY Project

      Before you buy a single thing, spend an afternoon sitting in your hot tub (or just standing near it) and figuring out exactly where you need coverage. I made the mistake of assuming I needed to screen the entire perimeter. In reality, I only needed to block two sightlines: the neighbors’ elevated deck to the northeast, and the side yard along our fence line.

      Measure Twice, Order Once

      Walk the area and mark out your coverage zones with stakes and string. Note the height you need — for most hot tub situations, you want at least 5 to 6 feet of solid screening. Also think about whether you need a freestanding structure or something you can attach to an existing fence or wall. That decision changes everything about your materials list.

      Think About Airflow and Moisture

      Hot tubs produce a lot of steam, and steam accelerates rot in untreated wood. Bamboo handles moisture better than most woods, but you still want some airflow through your screen rather than a completely sealed wall. Reed-style bamboo fencing is ideal here because the natural gaps allow air circulation while still blocking sightlines effectively.

      The Products That Made My Build Work

      I want to be honest about what I used so you can replicate this without the trial and error I went through. Here’s exactly what I’d recommend for a hot tub bamboo screen project:

      For the Main Privacy Wall

      The backbone of my screen was a natural reed fencing roll. I used the Bamboo Fence Reed Fencing 4 Feet High Bamboo Privacy Screen (4x16FT panels), which gave me enough coverage to run along my longest sightline with material left over. The natural reed look blended with my existing landscaping immediately — no painting, no staining, just unroll and attach.

      For Structural Support and Framing

      You need something to attach your reed fencing to, and this is where a lot of DIYers cut corners and regret it. I used Natural Bamboo Poles in 4″–4.5″ diameter at 6-foot lengths as my main vertical posts. These are cured and structural-grade, which means they’re strong enough to anchor the fencing without bowing or cracking in wet conditions. I set them in ground stakes and lashed the reed panels to them with natural jute twine. Simple, sturdy, and it looks intentional.

      For secondary framing and horizontal cross-support, I added COLOtime 8FT Bamboo Stakes, 1-inch diameter. These are heavy-duty enough to act as rails along the top and middle of the panel, keeping everything taut and preventing the reed fencing from sagging over time.

      For the Corner Accent Area

      The northeast corner — the one facing my neighbor’s deck — needed a slightly different solution because I couldn’t set posts in that spot without hitting a utility line. This is where I fell in love with the Outsunny Metal Outdoor Privacy Screen in Bamboo Brown. It’s freestanding, which meant no digging, no posts, and no stress about that utility line. The 78-inch height gave me more than enough coverage, and the climbing plant trellis design meant I could weave in some jasmine over time to soften the look even further.

      For a Lush, Finished Look

      Here’s my favorite trick: I placed several units of the Artificial Bamboo Tree 6Ft Privacy Fence Screen with real bamboo poles and UV-resistant faux leaves in large planters at the open ends of my screen. They look remarkably real, they require zero maintenance, and they tie the whole bamboo aesthetic together. Anyone who visits assumes I’ve been growing bamboo for years. I haven’t told them otherwise.

      My Real Cost Breakdown

      I know you want the numbers, so here they are with no fluff:

      • Reed fencing panels (2 rolls): approximately $85
      • Large structural bamboo poles (6): approximately $120
      • Heavy-duty bamboo stakes for framing: approximately $28
      • Outsunny freestanding privacy screen: approximately $140
  • 90 Days of Bamboo Cooking Utensils: My Honest Eco-Kitchen Experiment Results

    90 Days of Bamboo Cooking Utensils: My Honest Eco-Kitchen Experiment Results

    I accidentally threw away every metal utensil in my kitchen. On purpose. In a fit of eco-enthusiasm that I can only describe as “well-intentioned chaos,” I bagged up my entire collection of stainless spatulas, whisks, and slotted spoons and donated them to the thrift store — before my bamboo replacements had even arrived. For four days, I stirred soup with a wooden chopstick and flipped pancakes with the back of a silicone oven mitt. It was exactly as graceful as it sounds. But here’s the thing: ninety days later, after finally getting my hands on a proper bamboo cooking utensils review’s worth of experience, I am absolutely not going back to metal. Let me tell you everything.

    This post contains affiliate links. As an Amazon Associate, I earn from qualifying purchases. If you click a link and make a purchase, I may earn a small commission at no extra cost to you. I only recommend products I’ve personally tested and genuinely love.

    Why I Went All-In on Bamboo (and Why My Spatula Paid the Price)

    It started with a documentary. You know the type — beautiful cinematography, ominous statistics, a narrator with a voice that makes you want to compost your entire life. I paused it, looked at my kitchen drawer stuffed with plastic-handled spatulas and metal spoons scratching up my nonstick pans, and made a snap decision. Bamboo utensils. All of them. Immediately.

    What I did not account for was shipping time. So there I was, a grown adult, attempting to flip a grilled cheese sandwich using the flat edge of a butter knife while my bamboo order sat somewhere in a fulfillment warehouse. My husband walked into the kitchen, watched me for a silent moment, and quietly backed out of the room. Smart man.

    When the packages finally arrived, I tore into them like it was December 25th. And honestly? The quality stopped me in my tracks. I’d half-expected something flimsy and cheap-looking. What I got instead were smooth, sturdy, beautifully finished tools that actually felt good in my hand. I was converted before I even cooked anything.

    My Bamboo Cooking Utensils Review After 90 Days of Real Use

    I want to be honest with you the way a friend would be — not a glossy magazine, not a brand ambassador with a ring light. Here is what three full months of daily cooking taught me about bamboo utensils.

    The Durability Surprised Me

    Bamboo is a grass, not a hardwood, and I’ll admit I was a little worried about longevity. Would the spoons split? Would the edges fray? Ninety days later, my primary set looks almost exactly as it did on day one. The key, I learned, is proper care. Bamboo utensils should never be soaked in water or run through the dishwasher — both of those things cause cracking and warping over time. Hand wash them, dry them promptly, and give them an occasional rub with food-grade mineral oil or coconut oil to keep the wood conditioned. I do this about once a month, and it takes about three minutes.

    They Are Genuinely Gentle on Cookware

    This was the original reason I made the switch, and bamboo absolutely delivers here. My ceramic nonstick pan looks brand new. No scratches, no worn patches, nothing. Bamboo is naturally softer than metal but firm enough to actually scrape the bottom of a pan, flip food cleanly, and stir thick batters without bending. It’s a better tool, not just a gentler one.

    Heat Resistance Is Real But Has Limits

    Bamboo handles heat much better than plastic, and it won’t conduct heat the way metal does. I’ve rested spoons across a hot pot without any scorching. That said, I wouldn’t leave a bamboo utensil submerged in boiling liquid for an extended period. Use it, stir, rest it on the spoon rest. Treat it like a tool, not a thermometer.

    Bamboo Is Naturally Antimicrobial

    This is the detail that surprises most people. Bamboo contains a natural antimicrobial agent called bamboo kun, which helps resist the growth of bacteria on the surface. This doesn’t mean you should skip washing — please wash your utensils — but it does mean bamboo is a genuinely hygienic material for kitchen use, not just a pretty one.

    Tools I Use: The Sets Worth Buying

    Over the course of my experiment, I tested several different sets. Here are the ones I’d actually recommend, with honest notes on each.

    Best for Everyday Cooking

    The Riveira Bamboo Cooking Spoons 6-Piece Set became my daily workhorse. It includes a great mix of spoon shapes and spatulas, the finish is smooth without being slippery, and the handles are a comfortable length for both small and large pots. Ninety days of use and not a single crack.

    If you want a slightly richer, darker finish, the Riveira Dark Bamboo Wooden Spoons 6-Piece Set is a beautiful option. The darker bamboo gives it a more sophisticated look on the counter, and it would make a genuinely lovely housewarming gift. I keep this set out in a crock near my stove and get compliments on it constantly.

    Best Set with a Holder Included

    If you don’t already have a utensil holder, the Bamboo Utensils 7-Piece Set with Holder is a smart buy. You get seven pieces plus a matching bamboo holder, which means everything coordinates and you’re not hunting through a drawer. It’s lightweight, easy to clean, and the pieces feel sturdy and well-balanced.

    Similarly, the Bamboo Wooden Spoons & Spatulas Set with Holder offers a classic six-piece collection plus holder that keeps your counter looking organized. I particularly liked the spatula design in this set — it’s slightly thinner at the edge, which makes flipping delicate things like fish or eggs much easier.

    Best Budget-Friendly Option

    The Eisinly Wooden Spoons for Cooking 7-Piece Set punches well above its price point. If you’re just starting to transition to bamboo and you’re not sure how committed you are yet, this is a low-risk entry point that won’t disappoint. The pieces are solid, the shapes are practical, and it covered every cooking task I threw at it.

  • Why I Replaced All My Plastic Garden Stakes With Bamboo (And Never Looked Back)

    Why I Replaced All My Plastic Garden Stakes With Bamboo (And Never Looked Back)

    • Drive them in at planting time, not when your plant is already struggling. You’ll disturb fewer roots and get a better anchor.
    • Use a figure-eight tie when attaching stems to stakes. Loop the tie around the stake, cross it, then loop around the stem. This gives the stem room to move and grow without being strangled.
    • Angle the stake slightly toward the direction of prevailing wind if you’re in an exposed area. It dramatically improves stability under pressure.
    • Soak bamboo stakes overnight before driving them into hard soil.

      I want to tell you about the day I accidentally staked an entire raised bed with what turned out to be decorative cocktail skewers. Not garden stakes. Cocktail skewers. My Roma tomatoes were practically laughing at me by July.

      It was my third year gardening, and I’d grabbed what I thought was a fresh pack of plastic garden stakes from the garage shelf. They looked right. They were roughly the right length. They were, I later discovered while puzzling over a collapsed tomato cage, rated to hold approximately four olives and a maraschino cherry. My plants hit the dirt like tired toddlers. I hit rock bottom as a gardener. And that humiliating afternoon is exactly why I started doing real research into bamboo garden stakes vs plastic — and why I have never once regretted the switch I made the following weekend.

      This post contains affiliate links. As an Amazon Associate, I earn from qualifying purchases.

      The Problem With Plastic Stakes (Beyond My Cocktail Skewer Incident)

      Once I started paying attention, I realized the cocktail skewer disaster was just the most embarrassing symptom of a bigger problem. I had a garden full of plastic stakes in various states of defeat. Some had snapped clean in half mid-season. A few had cracked along the sides and were held together mostly by the twist ties wrapped around them. And every single fall, when I finally pulled them out to clean up the beds, I’d find another one had shattered into sharp little shards I had to hunt through the soil like a miserable Easter egg hunt.

      Here’s what I didn’t fully appreciate until I made the switch: plastic garden stakes are often made from low-grade polypropylene or fiberglass composites that degrade with UV exposure. The sun basically slowly destroys them all summer long, which is a remarkable design flaw for something intended to be used outdoors in the summer. They get brittle, they snap, they leave microplastic fragments in your garden beds. For anyone growing food, that last part is genuinely worth thinking about.

      Bamboo, on the other hand, is naturally strong along its grain, flexible enough to absorb wind stress without snapping, and it breaks down at the end of its life in the most garden-appropriate way possible: it becomes compost. Not confetti. Not shards. Compost.

      Bamboo Garden Stakes vs Plastic: What Actually Matters When You’re Choosing

      Not all bamboo stakes are created equal, and I say that as someone who now owns an embarrassing quantity of them. Here’s what I’ve learned actually matters when you’re shopping:

      Length Is Everything

      Match your stake length to your plant’s mature height, not its current height. A tomato plant that looks politely small in May will absolutely be towering over your fence by August. For determinate tomatoes and most peppers, 4-foot stakes work beautifully. For indeterminate tomato varieties, climbing beans, or cucumbers trained on a single stem, go longer — 48 inches or more.

      Thickness Determines Load

      Thin stakes (around 6-8mm) are perfect for indoor plants, seedlings, or flowers that just need a little guidance. Thicker stakes (10mm and up) are what you want when you’re asking bamboo to hold up a full-grown vegetable plant in a windstorm. Most product listings will tell you the diameter — actually read that number.

      Treated vs. Natural

      Some bamboo stakes are kiln-dried or heat-treated for extra durability and to prevent mold. For stakes that will be in contact with moist soil all season, this matters. Look for stakes that are described as natural or kiln-dried — both are fine, just understand that untreated bamboo in perpetually wet soil will break down faster.

      Tools I Use: My Favorite Bamboo Stakes on Amazon

      I’ve tried a lot of options over the past few seasons, and these are the ones I actually keep reordering:

      For indoor plants, seedlings, and craft projects, the HOPELF 50 Pack 8″ Bamboo Plant Stakes are my go-to. They’re slender, tidy, and come in three sizes (8″, 12″, and 16″), which makes them incredibly versatile. I used a pack of these to support my pepper seedlings this spring and had plenty left over for a little trellis craft project with my daughter.

      For tomatoes, beans, and anything that’s going to grow tall and heavy, I love the Suzile 100 Pcs Bamboo Stakes in 48 Inch. The bulk quantity is genuinely useful if you have more than a few raised beds, and 48 inches gives you enough stake to drive firmly into the ground and still have plenty of height above soil for your plants to climb.

      If you want something that comes with everything you need out of the box, the 32 Pcs Garden Stakes Set with Twist Ties is a fantastic starter kit. The included twist ties are a small detail that makes a real difference — soft enough not to cut into stems, and they’re right there with the stakes so you’re not hunting through a drawer for them.

      For medium-height plants — think young fruit trees, dahlias, or taller peppers — I reach for the Mininfa Natural Bamboo Stakes 4 Feet, 25 Pack. These are solid, well-sized for most vegetable garden situations, and the 25-pack is a reasonable quantity if you’re not ready to buy in bulk just yet.

      And for a smaller-quantity option that’s great for containers or raised beds with a mix of plants, the GAGINANG 20 Pcs Bamboo Plant Stakes, 18 Inches hit a nice sweet spot. Eighteen inches is perfect for most container tomatoes, potted herbs that are getting leggy, and flowers that need a little backbone through summer storms.

      Tips for Getting the Most Out of Your Bamboo Stakes

      • Drive them in at planting time, not when your plant is already struggling. You’ll disturb fewer roots and get a better anchor.
      • Use a figure-eight tie when attaching stems to stakes. Loop the tie around the stake, cross it, then loop around the stem. This gives the stem room to move and grow without being strangled.
      • Angle the stake slightly toward the direction of prevailing wind if you’re in an exposed area. It dramatically improves stability under pressure.
      • Soak bamboo stakes overnight before driving them into hard soil.
  • Making Bamboo Wind Chimes: The Craft That Made My Neighbor Cry (Happy Tears)

    Making Bamboo Wind Chimes: The Craft That Made My Neighbor Cry (Happy Tears)

    I almost set my backyard on fire trying to make a gift.

    That’s not a metaphor. There was an actual small fire, a very alarmed squirrel, and my garden hose doing the Lord’s work while I stood there in my bathrobe holding a craft knife and a half-finished set of DIY bamboo wind chimes. And yet — somehow — the whole ridiculous ordeal produced the most meaningful gift I’ve ever given anyone. My neighbor Margaret actually cried when she unwrapped them. Happy tears, I promise. She still texts me photos of them hanging on her porch to this day.

    This post contains affiliate links. As an Amazon Associate, I earn from qualifying purchases.

    Let me back up.

    The Wind Chime Incident (A Story of Ambition and Poor Planning)

    Margaret had mentioned, approximately forty-seven times over the past year, that she wanted wind chimes for her porch. Something natural. Something with a soft, mellow tone. Not the jangling metal kind from the hardware store, but the deep, woody sound she remembered from a trip to Bali decades ago. I, a person who had never crafted anything more complex than a grilled cheese sandwich, decided I would make them for her birthday.

    My first mistake was assuming I could “just wing it.” My second mistake was trying to use a scented candle to heat-treat my bamboo tubes at 6 a.m. on a Saturday, because I’d read that a small amount of heat removes excess moisture and I interpreted “small amount of heat” very loosely. The candle tipped. The bamboo shavings on my workbench caught. The squirrel on the fence screamed (they do that, apparently). The hose saved the day. The bathrobe did not survive with dignity intact.

    But you know what? After I cleaned up, made coffee, and actually read a proper guide, the chimes turned out beautifully. And you can skip the squirrel trauma entirely by following the steps below.

    Choosing the Right Bamboo for DIY Bamboo Wind Chimes

    This is where most beginners go wrong — and where I went wrong first. Not all bamboo behaves the same way when cut into chime tubes. The species, age, and wall thickness of your bamboo all affect the sound it produces. Thick-walled, mature bamboo creates that deep, resonant tone that makes a wind chime feel meditative rather than chaotic.

    Here’s what to look for when selecting your bamboo:

    • Wall thickness matters most. Thicker walls produce lower, richer tones. Thin-walled bamboo tends to give a sharper, shorter sound — fine for some styles, but less ideal for that mellow Bali vibe Margaret was after.
    • Use mature culms. Bamboo that’s at least 3–5 years old is drier, denser, and more acoustically resonant than young green canes.
    • Cut above the node. Each tube should include a closed node at one end if possible — this affects both the sound and the structural integrity of the chime.
    • Dry your bamboo properly. And I cannot stress this enough — do not use a scented candle. Allow cut bamboo to dry in a shaded, ventilated area for several weeks, or purchase pre-dried craft tubes so you can skip this step entirely.

    If you don’t have a bamboo grove to harvest from (or you do but it’s the middle of winter), pre-cut bamboo craft tubes are a fantastic shortcut. I’ve used the INature Bamboo Craft Tubes (100 Count, 5″) and been really happy with the consistency — same diameter, already dried, easy to work with. The Rivajam 125 Bamboo Sticks for Crafts are another solid option if you want more pieces to work with or experiment on before committing to your final design. For slightly longer tubes with a bit more acoustic depth, the IA Crafts Bamboo Tubes at 5.9″ long are worth considering — they come in a range of inner diameters which gives you more control over your tonal variety.

    Tools I Use for Making Bamboo Wind Chimes

    Beyond the bamboo itself, you’ll need a few key supplies. Some you probably already have. A couple of them I wish I’d bought before the bathrobe incident.

    Hardware and Assembly Supplies

    • A small hand saw or craft knife for trimming tubes to length (please use this instead of fire)
    • Sandpaper (150–220 grit) to smooth cut ends and prevent splitting
    • A drill with a small bit for creating suspension holes near the top of each tube
    • Nylon cord or fishing line for stringing the tubes — both hold up well outdoors
    • A wooden or bamboo platform piece to serve as the top from which your tubes hang

    If you want to blend bamboo tubes with some metal ones for a more complex sound profile — which I highly recommend — the 60 Pieces Wind Chime Tubes Parts Supplies kit is a great grab. Alternating materials creates a layered, melodic quality that’s really hard to achieve with one material alone. And if you’d rather start with a complete framework and add your bamboo tubes around it, the Glarks 61Pcs Wind Chime Kit includes multiple tube lengths, swivel hooks, and thread wire — everything you need in one box. I’d have saved myself a lot of measuring anxiety if I’d started with this.

    How to Tune Your Bamboo Chimes (Sort Of)

    You don’t need to be a musician to get a pleasing sound — but a little intentionality goes a long way. The length of each tube is your main tuning tool. Longer tubes produce lower tones; shorter tubes produce higher ones. A common approach is to cut five tubes in gradually increasing lengths — say, from about 9 inches down to 5 inches — and hang them in a slightly staggered circle so they catch the breeze from multiple angles.

    Tap each tube with a wooden dowel before you drill and hang it. Listen. Adjust the length by trimming small amounts from the bottom until you get a combination of tones

  • Bamboo Sheets Made Me a Morning Person: A Night Owl’s Unlikely 6-Month Conversion

    Bamboo Sheets Made Me a Morning Person: A Night Owl’s Unlikely 6-Month Conversion

    I set my alarm for 6 a.m. exactly once in my adult life — and it was entirely by accident. I meant to set it for 6 p.m. (for a nap, obviously), and when it shrieked at me in the pitch dark, I was so disoriented that I stumbled into the hallway and accidentally let my neighbor’s cat inside. We didn’t speak for three weeks. That was the level of morning person I was before my completely unplanned bamboo bed sheets review experiment six months ago — not the kind who writes blog posts about waking up refreshed, but the kind who once considered 10 a.m. “rushing it.”

    This post contains affiliate links. As an Amazon Associate, I earn from qualifying purchases.

    So when I tell you that I now wake up before my alarm, stretch like a golden retriever in a sunbeam, and actually look forward to mornings — I need you to understand the full absurdity of that sentence. Something changed. And that something was my sheets.

    The Incident That Started Everything

    Here is what happened. It was a sweltering July night, I had an early meeting the next morning, and I was doing what I always did: lying in bed like a sad rotisserie chicken, flipping from hot side to hot side, watching the clock tick toward 2 a.m. My cotton sheets — perfectly decent, perfectly normal — had become a damp, twisted cocoon of regret. In a fit of sleepless delirium, I grabbed my phone and started doom-scrolling for “why am I always hot at night.” One rabbit hole led to another, and at some unholy hour I found myself on Amazon, impulsively ordering bamboo bed sheets with the confidence of a person who had absolutely no idea what they were doing.

    I ordered dark grey. I don’t even like dark grey. I have no memory of making that color choice. Sleep deprivation is a powerful force.

    What Actually Makes Bamboo Sheets Different (And Why Hot Sleepers Should Care)

    Before I get to what happened when the sheets arrived, let me give you the actual science — because I spent a lot of post-conversion time nerding out on this, and it’s genuinely interesting. The sheets you’ll see recommended here are made from rayon derived from bamboo, which is the most common and widely available form of bamboo bedding. The bamboo plant is processed into a silky-soft fiber that has some legitimately impressive properties for sleep.

    Here’s what sets bamboo-derived sheets apart from standard cotton:

    • Moisture-wicking: Bamboo rayon pulls moisture away from your skin and disperses it, which means you stop feeling like you’re sleeping in a warm puddle after an hour.
    • Temperature regulation: The fiber structure allows better airflow than tightly-woven cotton, keeping the sleep surface cooler throughout the night.
    • Naturally breathable: Even without fancy cooling technology, bamboo fabric breathes. For hot sleepers, this is everything.
    • Softness that improves with washing: Unlike some fabrics that break down over time, high-quality bamboo rayon sheets tend to get softer with each wash, not rougher.
    • Hypoallergenic properties: Bamboo fabric is a good choice for sensitive skin, as it tends to be gentle and less irritating than rougher weaves.

    A few practical tips if you’re new to bamboo bedding: always wash on a gentle or delicate cycle with cold water, skip the high heat in the dryer (low or air dry is best), and avoid fabric softener — it actually coats the fibers and reduces the natural breathability you paid for. Treat them gently and they’ll last for years.

    My Honest Bamboo Bed Sheets Review After 6 Months of Real Use

    The sheets arrived three days after my midnight purchase. I unboxed them, held them up, and thought: these feel wildly fancy for something I bought while technically unconscious. They were smooth and cool to the touch in a way that felt immediately different from anything else in my linen closet. I made the bed with a level of enthusiasm I normally reserve for pizza delivery.

    That first night? I slept six and a half straight hours. For me, that was a miracle. I woke up and the sheets felt like they had been waiting in a refrigerator. Not cold — just perpetually, pleasantly cool. I wasn’t tangled. I wasn’t damp. I was, for the first time in years, comfortable.

    By month two, I had stopped taking melatonin. By month three, I was waking up before my alarm occasionally — something I initially reported to my doctor because I assumed something was medically wrong. By month six, I am, implausibly, a person who makes coffee before 7 a.m. and enjoys it. I have become the villain in every story I used to tell about morning people.

    Do bamboo sheets deserve all the credit? Probably not entirely — but they removed the main obstacle that was keeping me awake. When you’re not lying there overheated and miserable, sleep actually shows up on time.

    Recommended Products: The Bamboo Bedding I Actually Use and Love

    Whether you’re a chronic hot sleeper, a skeptic, or someone who just accidentally ordered something at 2 a.m. and wants to make an informed version of that choice, here are the bamboo sheet options I recommend most. All of these are rayon derived from bamboo, come in deep-pocket sizes that fit up to 16-inch mattresses, and have that hotel-quality silky feel that makes getting into bed genuinely exciting.

    Shilucheng Queen Bamboo Sheet Set – Dark Grey

    This is the style I started with — the one I panic-bought at midnight — and honestly, I regret nothing. The Shilucheng Queen Sheet Set in Dark Grey is a 4-piece set with a fitted sheet, flat sheet, and two pillowcases. The blend rayon derived from bamboo is noticeably breathable, and the dark grey color hides everything (a feature I did not anticipate but deeply appreciate). Great starter set if you want to test bamboo without overthinking the color palette.

    Love’s Cabin 100% Rayon Bamboo Queen Sheet Set – Beige

    If you want something that feels a little more classic and bright, the Love’s Cabin Queen Sheet Set in Beige is a beautiful option. This is 100% rayon derived from bamboo (no blend), which gives it an extra-silky hand feel. The beige is warm and neutral, and it photographs beautifully if you’re the kind of person who makes their bed and then takes pictures of it. (I have become this person. I’m sorry.)

    Bedsure Queen Bamboo Sheet Set – Dark Grey

    The March 29, 2026

  • Bamboo Flooring in My Bathroom: The Home Renovation That Gave Me Gray Hairs

    Bamboo Flooring in My Bathroom: The Home Renovation That Gave Me Gray Hairs

    • Always check the manufacturer’s warranty for wet areas. A product rated for bathrooms will say so explicitly. If it doesn’t, assume it isn’t.
    • Install an exhaust fan if you don’t have one. Humidity control is the single biggest factor in floor longevity in any bathroom.
    • Use a proper underlayment or vapor barrier. Even waterproof LVP benefits from the right underlayment for sound and comfort.
    • Acclimate your flooring. Let planks sit in the room for 48–72 hours before installation so they adjust to the temperature and humidity of the space.
    • Seal the perimeter. Use a waterproof silicone caulk along edges near the shower, tub, and toilet base — even with water

      The water damage showed up on a Tuesday. I remember because I was already having a terrible week — my contractor had just bailed on me mid-project, I’d blown my renovation budget by nearly $800, and now I was standing in my half-finished bathroom staring at a swollen, buckled mess where my brand-new bamboo flooring used to be. I sat down on the edge of the tub and genuinely considered crying. If you’ve ever Googled “bamboo flooring bathroom” at midnight in a panic, I see you. This post is for you.

      This post contains affiliate links. As an Amazon Associate, I earn from qualifying purchases. If you click a link and make a purchase, I may earn a small commission at no extra cost to you. I only recommend products I’ve personally researched or used.

      How I Got Here: The Dream Bathroom Renovation Gone Wrong

      It started with Pinterest. As these things often do. I’d been obsessed with the idea of a spa-like bathroom with warm, natural materials, and when I discovered bamboo flooring, I was completely sold. It was sustainable, it looked gorgeous, and the price point felt like a gift from the renovation gods. I bought solid bamboo planks, watched approximately forty-seven YouTube videos, and installed them myself over a long weekend while my partner, Jamie, very patiently did not say “I told you so.”

      Jamie had raised an eyebrow when I picked solid bamboo for the bathroom. “Isn’t that going to be an issue with moisture?” they asked. I waved it off confidently. Reader, I should not have waved it off.

      Within three months, the planks near the shower were lifting. By month five, one section had buckled so badly I was genuinely worried about a trip hazard. The solid bamboo — which is technically a grass, not a wood, but behaves similarly when it comes to moisture — had absorbed humidity from daily showers and expanded beyond what the installation could handle. I’d skipped a proper vapor barrier, used the wrong adhesive, and hadn’t sealed the edges near the shower curb. A triple-threat of rookie mistakes that cost me real money and real relationship strain.

      The Truth About Bamboo Flooring in Bathrooms (What I Wish I’d Known)

      Here’s the honest talk I needed before I started: bamboo flooring and bathrooms have a complicated relationship, and the type of bamboo product you choose makes all the difference. Let me break down what I learned the hard way.

      Solid Bamboo in a Full Bathroom: Proceed With Caution

      Solid bamboo planks — even strand-woven, which is denser and more moisture-resistant than traditional bamboo — are not ideal for high-humidity bathrooms with showers or tubs. They can work in a powder room with low humidity exposure, but in a bathroom where steam is a daily reality, the risk of warping and swelling is significant. Proper sealing, a moisture barrier underneath, and excellent ventilation are non-negotiable if you go this route.

      Bamboo-Look LVP: The Smart Middle Ground

      What I eventually discovered — and what completely saved my sanity — is that luxury vinyl plank (LVP) flooring with a wood or bamboo-style finish gives you the look you’re going for with 100% waterproof performance. SPC (stone plastic composite) core LVP is rigid, dimensionally stable, and genuinely impervious to moisture. It’s what I used for my redo, and I haven’t looked back.

      If you want solid bamboo elsewhere in your home — a kitchen, bedroom, or living space — it’s a wonderful, sustainable choice. Just pair it with the right environment.

      Products I Actually Recommend (Learned From Experience)

      After my bathroom saga, I spent weeks researching before buying anything new. Here’s what made the cut.

      For Bathrooms and High-Moisture Spaces

      This is exactly what I replaced my damaged floor with, and it has been flawless for over a year now. The SPC Click Lock Luxury Vinyl Flooring Plank in Oak-2 is 5mm thick with a rigid core and is genuinely 100% waterproof — not water-resistant, waterproof. The click-lock install was so much easier than my original bamboo project, and the warm oak tone gave me that natural look I was after. If you prefer a slightly richer, more varied wood tone, the SPC Click Lock Luxury Vinyl in Umbrian Oak is a beautiful alternative from the same line.

      For Living Rooms, Bedrooms, and Kitchens

      If you’re installing in a lower-humidity space and want real bamboo underfoot, the Jeedeson Solid Bamboo Flooring in Light Honey is a gorgeous option. The tongue-and-groove system makes it a manageable DIY project, and the light honey color is warm and versatile. I’m actually planning to use this in our bedroom refresh next spring.

      For Keeping Your Floors Looking Their Best

      Whichever flooring you choose, maintenance matters. I alternate between two cleaners depending on what I need. For a heavier clean, the Rock Doctor Flooraid+ Bamboo Floor Cleaner Spray is my go-to — non-abrasive, rinse-free, and it smells great. For my regular weekly mop, I love the Better Life Floor Cleaner in Citrus Mint, which is plant-derived and safe for bamboo, hardwood, vinyl, and laminate. It leaves zero streaks and the scent is genuinely lovely.

      Practical Tips Before You Install Anything

      • Always check the manufacturer’s warranty for wet areas. A product rated for bathrooms will say so explicitly. If it doesn’t, assume it isn’t.
      • Install an exhaust fan if you don’t have one. Humidity control is the single biggest factor in floor longevity in any bathroom.
      • Use a proper underlayment or vapor barrier. Even waterproof LVP benefits from the right underlayment for sound and comfort.
      • Acclimate your flooring. Let planks sit in the room for 48–72 hours before installation so they adjust to the temperature and humidity of the space.
      • Seal the perimeter. Use a waterproof silicone caulk along edges near the shower, tub, and toilet base — even with water
  • I Built a Bamboo Garden Fence in 3 Weekends: Every Embarrassing Mistake Documented

    I Built a Bamboo Garden Fence in 3 Weekends: Every Embarrassing Mistake Documented

    • Use galvanized or stainless hardware. Regular staples and wire will rust and stain your bamboo within a season. Spend a little more on corrosion-resistant fasteners and you’ll thank yourself in year two.
    • Plan for panel overlap at joints. Where two panels meet at a post, let them overlap by a few inches

      The moment I realized I had installed an entire section of my DIY bamboo garden fence upside down — yes, upside down — was the same moment my neighbor Dave walked over to “see how it was going.” He didn’t say anything. He just stood there, coffee mug in hand, staring at my lopsided creation with the kind of expression you’d give a child who proudly showed you a drawing of a horse that looked like a melting accordion. That was Weekend One. It got worse before it got better.

      This post contains affiliate links. As an Amazon Associate, I earn from qualifying purchases. If you click a product link and buy something, I may earn a small commission at no extra cost to you. I only recommend products I’ve actually used or researched thoroughly — including the ones that saved this disaster of a fence project.

      I’m writing this from my backyard, sitting in a chair I dragged next to my now-genuinely-beautiful bamboo fence, cold lemonade in hand, feeling smug in that specific way you only feel after surviving something humbling. If you’re thinking about building your own bamboo fence and you have roughly zero construction experience (hi, that’s me), this post is for you. I’m going to tell you everything — including the parts I’m mildly ashamed of.

      Why I Chose Bamboo (And Why It Took Me Three Weekends)

      My backyard has always looked directly into my neighbor’s garage. Not a shed — a full detached garage with a bright fluorescent light that glows into my kitchen like a suburban lighthouse. I wanted privacy. I wanted something that looked natural and warm, not like a plywood barricade. And honestly, I’d been reading about bamboo fencing on this very website and I thought: how hard could it be?

      Bamboo is genuinely one of the best materials for a garden fence. It’s sustainable, it’s beautiful, it weathers gracefully, and rolled bamboo fence panels are designed to be beginner-friendly. The key is understanding what you’re working with. Bamboo poles are round and organic — they’re not going to behave like lumber. There will be slight variations in diameter, gaps between poles, and natural color differences from panel to panel. That’s not a flaw. That’s character. It took me until Weekend Two to emotionally accept this.

      The Tools and Materials That Actually Helped

      Before we talk about my mistakes — and we will talk about them — let me share the products that genuinely made this project work. After my first weekend disaster, I did a lot of research and made some smarter purchases.

      Bamboo Fence Panels

      I ended up using two different panel heights for different sections of the fence. For the main privacy run along the garage side, I used the Backyard X-Scapes 6 ft x 8 ft Natural Bamboo Rolled Fence Panel. These are solid, well-constructed, and the 6-foot height gave me real privacy without looking like I was building a fortress. For the shorter decorative sections near my raised beds, I went with the Backyard X-Scapes 4 ft x 8 ft version, which has the same great quality but a lighter, more garden-friendly scale.

      For my balcony section (yes, I got ambitious), I added the Mininfa Natural Bamboo Slat Screening Panel. This one has a slightly different look — flatter slats rather than round poles — and it works beautifully as a wind and sight barrier. It gave that section a more modern, intentional look that I didn’t expect to love as much as I do.

      Post Drivers (The Tool I Wish I’d Bought First)

      Here is where Weekend One went sideways. I tried to drive my fence posts into the ground using a rubber mallet and what I can only describe as stubborn optimism. After 45 minutes, I had one crooked post and a bruised ego. A post driver is not optional. I eventually tried the Sekcen 8LB Fence Post Driver and then also grabbed the Gtongoko 8LB Heavy Duty Post Driver for comparison. Both worked far better than anything I improvised. The handles on these tools let you drive posts straight down with real control — critical when you’re trying to keep things level and you’ve already humiliated yourself in front of Dave.

      My DIY Bamboo Garden Fence: The Embarrassing Lessons

      Let’s get into it. Here are the actual mistakes I made and what I learned from each one.

      • I installed a panel upside down. Rolled bamboo panels have a top and a bottom — the wire binding runs along both edges and the cut ends of the bamboo poles face down. I got excited, went fast, and attached an entire 8-foot section with the cut ends pointing up. Water pooled in the hollow poles. I caught it quickly, but the re-stapling process was not graceful.
      • I didn’t account for post spacing properly. Standard rolled panels are 8 feet wide. My posts needed to be set at 8-foot intervals — but I set them slightly inside that, which meant the panels overlapped awkwardly in spots. Measure your post spacing before you dig or drive anything. Write it down. Tape it to your forehead if necessary.
      • I underestimated how heavy the 6-foot panels are. Unrolling and holding a bamboo panel in place while also trying to staple it to a post is a two-person job. I learned this the hard way when a panel slowly unrolled away from me like a departing ship. Get a helper for this step or rig up a temporary prop.
      • I skipped sealing the posts. Wood fence posts that go into the ground need to be treated or sealed at the base to prevent rot. I remembered this fact on Weekend Three, after the posts were already in. I’ve since treated what I can reach. Learn from my laziness.
      • I didn’t level as I went. A string line and a level are not optional accessories. They are the entire project. By the time I reached the fourth post, my fence had developed a gentle but unmistakable slope that I had to correct by pulling posts and starting over. Weekend Two was largely a do-over of Weekend One.

      Practical Tips for Building a Bamboo Fence That Actually Stays Up

      • Use galvanized or stainless hardware. Regular staples and wire will rust and stain your bamboo within a season. Spend a little more on corrosion-resistant fasteners and you’ll thank yourself in year two.
      • Plan for panel overlap at joints. Where two panels meet at a post, let them overlap by a few inches
  • Bamboo Cutting Boards Changed My Kitchen: An Honest Convert’s Review

    Bamboo Cutting Boards Changed My Kitchen: An Honest Convert’s Review

    I once used a bamboo cutting board as a makeshift sled lid during a freak October snowstorm. Yes, you read that correctly. I dragged my brand-new, never-been-used bamboo board outside, plopped it under my nine-year-old, and watched him careen down our tiny backyard hill three glorious times before I remembered I’d bought it to chop onions. If you’re looking for a bamboo cutting board review written by someone with excellent judgment, I regret to inform you that you’ve come to the wrong place — but stay anyway, because the story ends well and so does my kitchen.

    This post contains affiliate links. As an Amazon Associate, I earn from qualifying purchases.

    After the Great Sled Incident of last autumn, I figured I owed that board a proper second chance. I wiped off the grass stains, oiled it up, and actually started using it in my kitchen the way nature — and the Amazon warehouse — intended. What happened next genuinely surprised me. Within a few weeks, I had quietly retired every plastic cutting board I owned. What follows is my completely honest, slightly embarrassing account of how bamboo cutting boards changed the way I cook.

    Why I Was Skeptical of Bamboo Cutting Boards (And Why I Was Wrong)

    I’ll be upfront: I was a plastic-board person for most of my adult life. Plastic seemed practical — toss it in the dishwasher, done. But plastic boards develop deep knife grooves surprisingly fast, and those grooves are basically tiny bacteria apartments. Research from the University of California, Davis actually found that bacteria on wooden and bamboo surfaces tend to die off naturally, while bacteria in plastic grooves can survive repeated washing. That alone made me willing to give bamboo a real shot.

    Bamboo has some genuinely impressive properties that make it ideal for kitchen cutting surfaces. It’s one of the hardest grasses on earth — technically a grass, not a wood — yet it’s gentler on knife edges than most hardwoods because of its natural fiber structure. It’s also naturally moisture-resistant and contains a biological agent called bamboo kun, which gives it antimicrobial properties. And unlike slow-growing hardwood trees, bamboo reaches harvest maturity in three to five years, making it a dramatically more sustainable choice.

    My Bamboo Cutting Board Review: What I Actually Use Every Day

    After testing several boards over the past several months, I’ve settled on a clear rotation in my kitchen. Here’s what I recommend and why.

    For Big Jobs: The Empune 2XL Bamboo Cutting Board

    This board — the Empune 2XLarge 20″ Bamboo Cutting Board — is the one I now keep on my counter full-time. The 20-inch length is genuinely life-changing when you’re breaking down a whole chicken or slicing a watermelon without half of it ending up on the floor. The juice groove is deep enough to actually catch liquid (unlike some boards where the groove is basically decorative), and the built-in handles make it easy to carry to the table as a serving board. It’s heavy-duty without feeling clunky.

    A Great Mid-Size Option: Keechee Extra Large Bamboo Cutting Board

    If 20 inches sounds like too much real estate, the Keechee 18-Inch Extra Large Bamboo Cutting Board hits a sweet spot. It comes pre-oiled, which is a huge bonus for anyone who’s ever received a brand-new board and immediately forgotten to condition it before use (definitely not speaking from experience). The handles are elegantly designed, and it doubles beautifully as a cheese board when company comes over. I’ve used mine for everything from slicing sourdough to prepping a full stir-fry’s worth of vegetables.

    Best Value Pick: Hiware Organic Bamboo Cutting Board

    The Hiware Extra Large Bamboo Cutting Board is the one I’d recommend to someone who wants to try bamboo without a big financial commitment. It’s 100% organic bamboo, arrives pre-oiled, and has a solid juice groove. At 18″ x 12″, it’s a practical everyday size. The surface feels smooth and substantial, and after months of daily use, mine shows barely any knife marks. Solid, reliable, and genuinely good quality.

    The One Thing Most People Skip (And Regret): Oiling Your Board

    Here’s where most bamboo board owners go wrong: they skip the oiling routine and then wonder why their board starts cracking after a few months. Bamboo, like wood, needs regular conditioning to stay hydrated and resist warping. This is not difficult. It takes about five minutes and feels oddly satisfying — like giving your kitchen tools a little spa day.

    You want a food-grade mineral oil that won’t go rancid. I use two options depending on my mood:

    A few practical oiling tips to keep your board in top shape:

    • Oil a new board before first use, even if it arrives pre-oiled — a second coat gives extra protection.
    • Oil monthly for regular-use boards, or whenever the surface starts to look dry or pale.
    • Always oil both sides to prevent uneven moisture absorption, which causes warping.
    • Never soak bamboo boards in water or put them in the dishwasher — hand wash and dry immediately.
    • Stand the board upright to dry so air circulates on both sides.

    The Happy Ending (For Me and the Board)

    So here’s how the sled board story ends. After I cleaned it up and started using it properly, that original bamboo board became my most-used kitchen tool. It’s been through hundreds of meal preps, one memorable Thanksgiving turkey carving, and approximately forty-seven rounds of avocado toast. It has not cracked. It has not warped. It does not harbor mysterious smells. It

  • Building a DIY Bamboo Garden Trellis: The $25 Project That Made My Garden Instagram-Famous

    Building a DIY Bamboo Garden Trellis: The $25 Project That Made My Garden Instagram-Famous

    • Mark your layout first. Use stakes and string to mark where your uprights will go before you touch a single bamboo pole. For a basic A-frame or flat grid trellis, two to four uprights are all you need. Spacing them evenly — typically 18 to 24 inches apart — will make the whole thing look intentional and professional.
    • Drive uprights in at least 12 inches deep. For an 8-foot stake, that means you’ll have about 6.5 feet of usable height above ground. Use a mallet rather than a hammer to avoid splitting the bamboo at the top.
    • Lash your crosspieces with a square lashing technique. Start by wrapping the twine around the vertical pole just below where the horizontal pole will rest, then bring it up and around both poles in a figure-eight pattern, pulling firmly after each wrap. Finish with two or three tight frapping wraps between the poles to cinch everything together, then tie off with a square knot. It sounds more complicated than it is — watch one two-minute video and you’ll have it down.
    • Use the thicker 3mm jute at structural joints and the thinner

      I want to tell you about the afternoon I accidentally glued my hand to a bamboo pole in front of my entire neighborhood. It was a Tuesday. My garden looked like a sad tangle of tomato plants leaning against each other like tired commuters on a subway, and I had decided — with exactly zero woodworking experience — that I was going to build a DIY bamboo garden trellis before sundown. Reader, I did not finish before sundown. But I did end up with 47 new Instagram followers and a story I will never live down.

      This post contains affiliate links. As an Amazon Associate, I earn from qualifying purchases.

      If you’ve been eyeing those gorgeous bamboo trellises in garden magazines and thinking there’s no way you could pull that off, I’m here to tell you: you absolutely can. And if I can do it — a person who once spent twenty minutes trying to figure out which end of a hand saw does the cutting — you are going to be just fine. Let me walk you through exactly how I built mine for under $25, complete with the hard-won wisdom that only comes from publicly embarrassing yourself in your front yard.

      Why Bamboo Is the Perfect Trellis Material

      Before we get to the tools and the technique, let’s talk about why bamboo is genuinely wonderful for this project and not just trendy. Bamboo is one of the strongest natural materials you can use in a garden setting, with a tensile strength that rivals steel relative to its weight. It’s also naturally resistant to moisture, which means it won’t rot out on you after one rainy season the way cheap wooden dowels tend to do. It’s lightweight, easy to work with, and — this is the part that keeps getting me — it looks absolutely beautiful in a garden. There’s a warmth and an organic elegance to bamboo that plastic or wire trellis panels simply cannot replicate.

      For a trellis project, you’ll want to think about the scale of what you’re growing. Lighter climbers like sweet peas, beans, or small cucumbers can be supported beautifully by thinner stakes arranged in a fan or grid pattern. Heavier plants like tomatoes, grape vines, or large squash need something with more girth and a sturdier base. The good news is that bamboo stakes come in a range of sizes, so you can match the material to the job.

      Tools and Materials for Your DIY Bamboo Garden Trellis

      Here’s everything I used to build my trellis. The total came in right around $25, and I had leftover materials for two more smaller projects. I’ve linked everything I actually bought so you can grab the same stuff without having to guess.

      Recommended Products

      • For lighter climbers and the vertical uprights of a fan trellis: COLOtime Bamboo Stakes 58 Inch, 20 Pack — These are a great mid-height stake for beans, sweet peas, and shorter flowering vines. The 20-pack gives you plenty to work with for a full trellis panel.
      • For the main structural uprights if you’re supporting tomatoes or heavier vines: Cambaverd Bamboo Stakes 8 Feet, 1 Inch Diameter, 10 Pack — These thicker, taller poles are what I used for the main frame of my trellis. The one-inch diameter makes a real difference in stability, and eight feet gives you plenty of height above ground after you sink them in.
      • For filling in the grid work or a smaller project: Mininfa Natural Bamboo Stakes 4 Feet, 25 Pack — The 25-pack at four feet is ideal for the horizontal crosspieces of your trellis grid, or for building a shorter trellis for a container garden.
      • For tying everything together (and this is where I nearly went wrong — more on that in a moment): Vivifying Garden Twine, 656 Feet, 2mm Green — The thinner 2mm twine is perfect for lashing joints and tying plant stems to the trellis without cutting into them.
      • For a sturdier lash at the main structural joints: Vivifying Jute Twine, 328 Feet, 3mm Brown — The thicker jute is what you want where two poles cross and need to hold real weight. It’s also beautiful — the brown color looks completely natural against the bamboo.

      Beyond these, you’ll need a mallet or rubber hammer to drive the uprights into the ground, and a pair of garden snips or a small hand saw for trimming any stakes to length. That’s genuinely it.

      How to Build the Trellis: Step by Step

      Okay, so here’s where things went sideways for me — and where they can go beautifully right for you if you learn from my disaster. I decided to skip the planning phase entirely because I am, at heart, an impulsive person who finds measuring deeply boring. I jammed my uprights into the ground with great enthusiasm, approximately eyeballed the spacing, and then realized I had built a parallelogram instead of a rectangle. My trellis leaned to the left like it was listening to something happening next door.

      My neighbor Carl watched this entire process from his driveway. He said nothing. He just nodded slowly, the way you nod at something you’ve decided not to comment on.

      Here is what I should have done — and what you should do:

      • Mark your layout first. Use stakes and string to mark where your uprights will go before you touch a single bamboo pole. For a basic A-frame or flat grid trellis, two to four uprights are all you need. Spacing them evenly — typically 18 to 24 inches apart — will make the whole thing look intentional and professional.
      • Drive uprights in at least 12 inches deep. For an 8-foot stake, that means you’ll have about 6.5 feet of usable height above ground. Use a mallet rather than a hammer to avoid splitting the bamboo at the top.
      • Lash your crosspieces with a square lashing technique. Start by wrapping the twine around the vertical pole just below where the horizontal pole will rest, then bring it up and around both poles in a figure-eight pattern, pulling firmly after each wrap. Finish with two or three tight frapping wraps between the poles to cinch everything together, then tie off with a square knot. It sounds more complicated than it is — watch one two-minute video and you’ll have it down.
      • Use the thicker 3mm jute at structural joints and the thinner